Scenarios for Entra Workload Identity Federation includes Github Actions or apps running in Google Cloud (GCP) or AWS or other computing platforms. The traditional way of configuring authentication between those platforms and Entra would be to share an application client id and secret, or certificate, so that the external apps can authenticate with Entra. This works well but comes with the tax on lifecycle management where you have to periodically share new client secrets or certificates with the external party as they expire overtime.
Token Exchange
Entra Workload Identity Federation is a new and simpler way of solving this identity integration. Via trusting an external identity provider (IDP), such as GCP, AWS or any OIDC provider, Entra can accept an access token from these IDPs and exchange it for an Entra access token. The benefit of token exchange is that a) the external app must first authenticate with its IDP to get an access token to give Entra, and b) Entra does not have to share client secrets or certificates and do the lifecycle management of them. The possible risk with this federation is that you now trust an external identity provider to do the right thing in keeping secure. However, sharing client secret or certificate, you took the same risk in trusting that the external party kept them secure.
Entra configuration
You configure Workload Identity Federation on an App registration. This makes sense as the external app calls the Entra oauth2/v2.0/token endpoint using the client_credentials grant_type flow, passing the client_id of the Entra application.
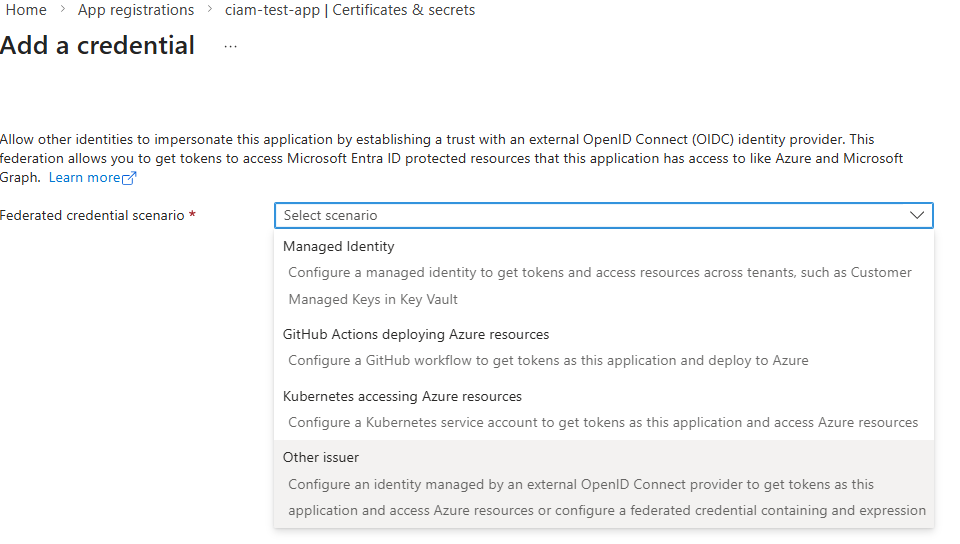
In the “Certificates & Secrets” blade, there is a tab named “Federated credentials”. When you click “+Add credential”, you are presented with a drop-down of preselected federation scenarios, like Github Actions, Kubernetes, etc. For OIDC identity providers, like GCP, AWS and others, you choose “Other issuer”.
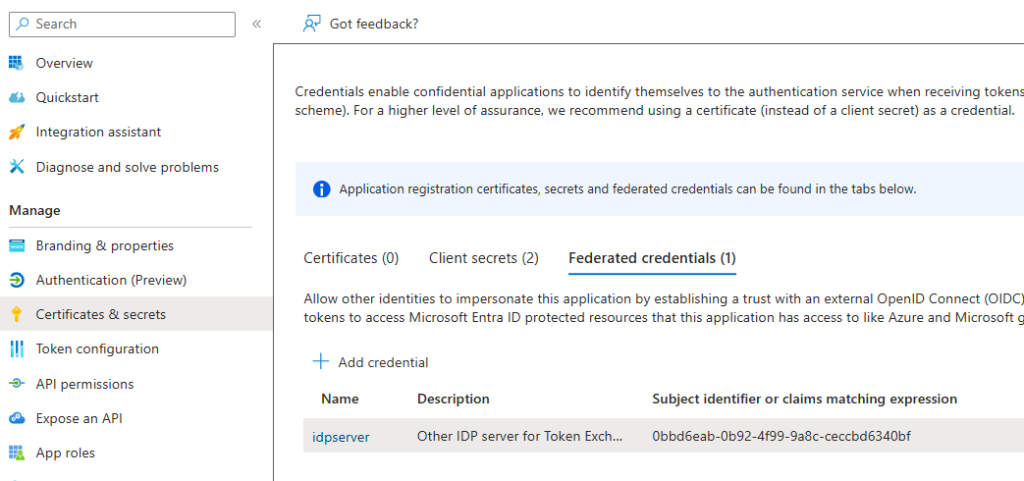
To accept an access token from the other IDP, you need to specify:
- The issuer (iss)
- The subject (sub)
- The audience (aud)
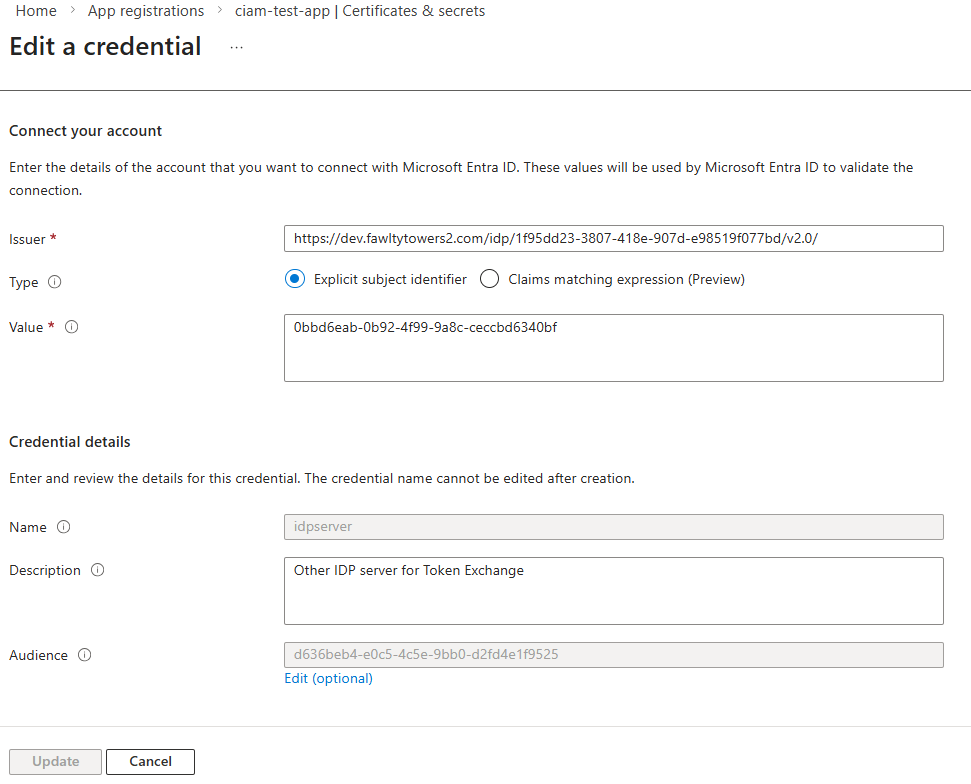
These three values should all be in the access token as claims iss, sub and aud. If the subject claim has a different name than “sub” you use the “Claims matching expression” to specify the name.
Beware that the “Issuer” entry is not the .well-known/openid-configuration endpoint, which would have been the more natural choice (as that endpoint tells you the issuer). Now it is inferred that there will be a .well-known/openid-configuration endpoint behind what you specify in the “Issuer” entry, else the token exchange will fail when Entra tries to validate the JWT token passed.
For the “Audience” entry, click Edit for it to open up, then enter the value your OIDC IDP has in its access token.
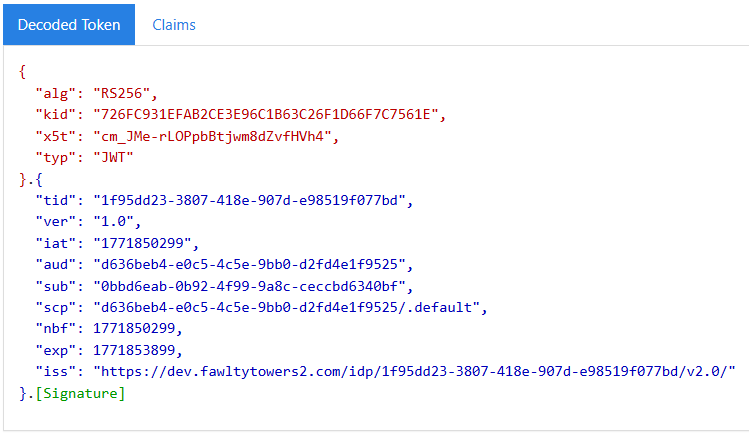
The access token generated by my test IDP provider.
What “Other” OIDC providers can be added? Everything but Entra is the simple answer. You can’t federate Entra with Entra.
Requested App Permissions
When the external app makes the call to Entra’s token endpoint requesting the token exchange, it does this using the OIDC client_credential grant flow. It passes its access token in the client_assertion parameter. In Powershell, the call would look like this:
Invoke-RestMethod -Method Post
 -Uri https://login.microsoftonline.com/$tenantIdEntra/oauth2/v2.0/token"
 -Body @{
  grant_type="client_credentials";
  client_id=$ClientIdEntra;
  client_assertion_type="urn:ietf:params:oauth:client-assertion-type:jwt-bearer";
  client_assertion=$access_token_Other;
  scope="3db474b9-6a0c-4840-96ac-1fceb342124f/.default" `
 }
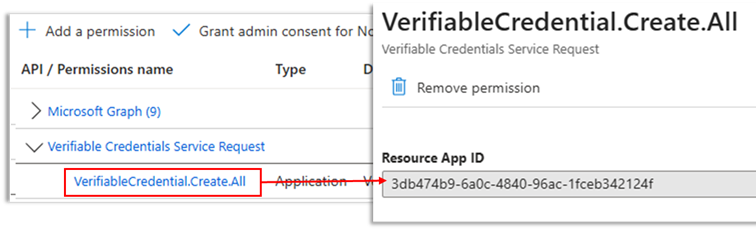
The external app requests permissions in the scope parameter. In this case the Entra application has the permission to call the Entra Verified ID API (3db474b9-6a0c-4840-96ac-1fceb342124f) and the external app requests that permission. Other example scopes could be https://graph.microsoft.com/.default for access to Microsoft Graph, https://management.azure.com/.default for access to managing Azure resources.
Sign-in Log Events
In Entra’s sign-in logs, there will be an event entry in the “Service principle sign-ins” tab. If you inspect the details, you will see that it says “Federated identity credential” for the type.
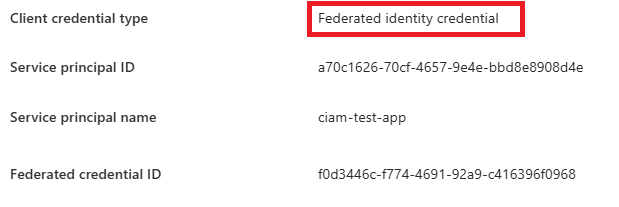
The Federated credential ID is the identity of the configuration and you can inspect it via Graph API to back track which app and federation was used.
GET /applications(appId='{appId}')/federatedIdentityCredentialsAWS outbound identity federation
If you want to try this with AWS, you can follow their blog about how to set up outgoing identity federation in AWS.