This will be a short post on the subject on how to upload files to Azure Blob Storage without sharing the key or making the storage container public. This technique has been used in many projects that I’ve worked on over the years so I thought its time to share it. The trick is to use Shared Access Signatures (SAS) to limit access to what is just needed. The second part of the trick is to issue the SAS-Token just-in-time so that you avoid building unnecessary and complex code handing them out.
Upload a file from a browser to Azure Blob Storage
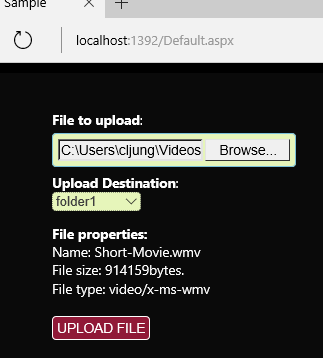 In my case, I have a sample web application that should upload files to the Cloud where the target is Azure Blob Storage.
Using the the Put Block and Put Block List REST API’s that Blob Storage exposes, the uploading part can be done entierly with javascript. This means that when the UPLOAD FILE button is pressed in UI, the uploading of the file is done directly from the browser to Azure Storage (see links in the refs section). What really happens is that the file is sent in in 256KB chunks (blocks) and when the last block is sent, a final REST API call is made to commit the list of blocks sent. Azure Storage then creates the blob by the sum of its parts. This has been around since day 1 of Azure.
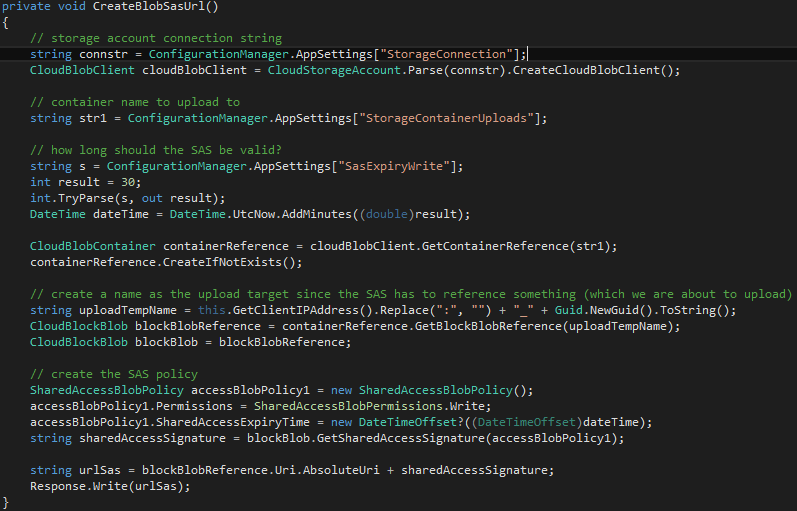
The SAS-token is generated as the first thing when the UPLOAD FILE button is pushed. Before sending the first block, the javascript code makes a call to the web application requesting a SAS-token. Since a SAS-Token can either be given to a whole container or to a file. My solution is to create a dummy file in Azure Blob Storage, generate a SAS-Token valid for writing to that file the next 30 minutes and return that SAS-Token to the browser.
You can see that I create the dummy file having with a name consisting of the clients IP address combined with a guid. The reason for this is that I later process all files that the same IP address have uploaded.
In the code above, I first create the blob file, then I create a SharedAccessBlobPolicy object with the 30 minute write authorization and use that to call GetSharedAccessSignature on the blob object. Appending that to the url to the blob object gives the browser a usable url that can be used by the javascript to call the REST APIs. No other authorization is needed.
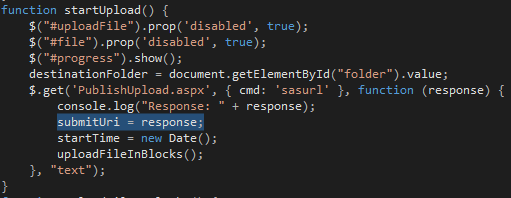
The javascript calling the web app asking for a SAS-Token saves the response contaning the complete url. This will be the base url in later calls.
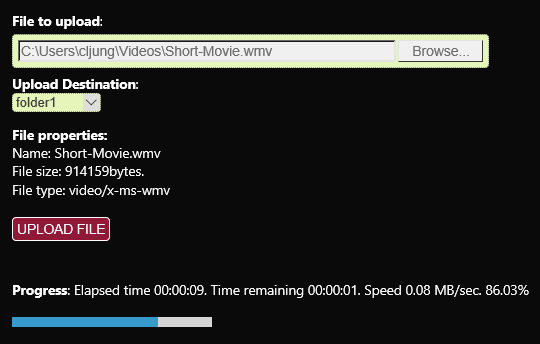
Once the SAS-Token is received, the upload action starts and the progress meter tells you how you are doing in the chunked upload. As a bonus, I measure upload speed (which wasn’t so great from the hotel wifi I was using at the time).
Renaming the file when it is uploaded
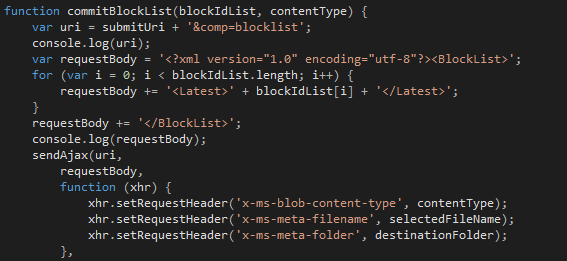
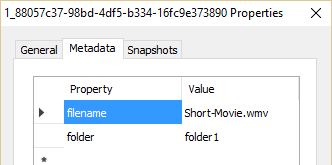
When the upload is complete, we have to rename the file to it’s real name, since it has a temporary name consisting of the IP address and a guid. The real name of the file and in what folder I should be stored it is passed as http request header attributes in the REST API calls we make. Doing that makes them appear as metadata attributes on the blob file. You could extend this to pass more data together with the upload.
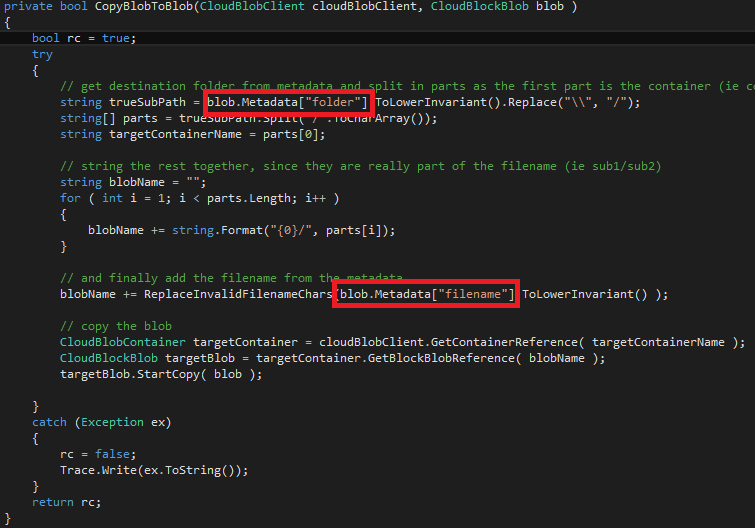
This means that when we process the upload, we can look into the metadata of the blob and know what the file should be named and where it should be stored. You could extend this to include a Title and Description attributes of the video file, etc, in order to meet the needs of your post processing.
The post process after the upload could be starting a media services encoding job or moving your file to some part of a digital asset management system. In my case, I just move the blob from the upload container to the container selected by the user.
Summary
When ingesting data to Azure Storage, you should not share the storage accounts key with anything that is external that you do not have direct control over, since you are really giving away full access to that storage account. You should use SAS-Tokens that only give the access needed and that only are valid for a certain time. In my case it was 30 minutes, but it may even shorter och perhaps a token valid for many months.
Generating the tokens is easy and it is quite possible to do it just-in-time for specific purposes, like the upload of a file, to reduce the burden of having some admin code part granting tokens where needed. Of course, you must have authentication somewhere to protect who’s creating the SAS-tokens and my web app should really have been forcing the user to login to be able to upload.
References
Shared Access Signatures documentation
https://azure.microsoft.com/en-us/documentation/articles/storage-dotnet-shared-access-signature-part-1/
Storage REST API Put Block documentation
https://msdn.microsoft.com/en-us/library/azure/dd135726.aspx
Source Code
This Visual Studio project is a very short example what I explanied above. The javascript file upload.js is initially not mine. You will find many similar scripts on the internet. However, I have modified it quite heavily for the getting the SAS-Token, the progress meter and the publish function at the end. The VS solution also contains code for working with the file system in case you want the uploaded file to be moved to a file share instead of a blob container.
