Todays blog post is about how to setup federation from RedHat KeyCloak to Azure AD B2C. I’m going to make it simple in KeyCloak and not setup Realms, etc, to keep it simple.
Installing KeyCloak and adding B2C as an Identity Provider
I downloaded KeyCloak from here and if you unzip it, you will find a folder named standalone and there you can start KeyCloak in standalone, console, mode by invoking the below command. You have a bash script for Mac/Linux. Then you can open http://localhost:8080/auth/admin and create your admin account.
cd bin
.\standalone.bat
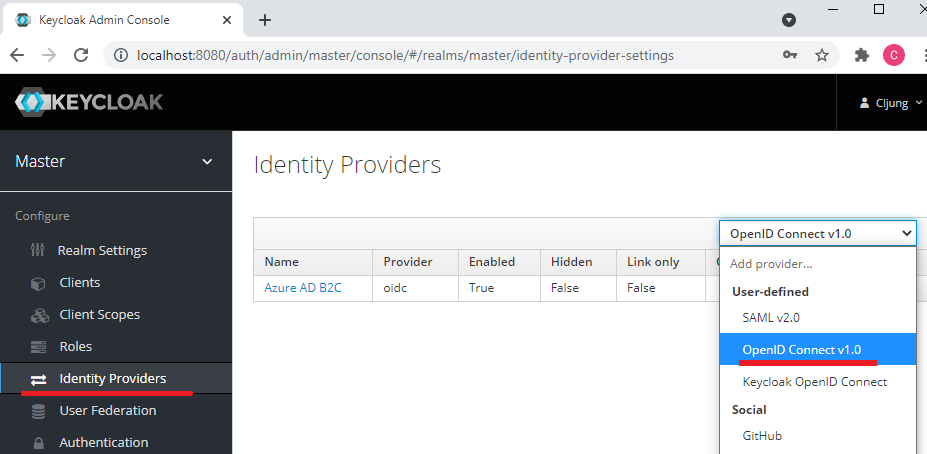
To Add Azure AD B2C as an identity provider, you select Identity Provider in the left side menu and choose OpenID Connectio v1.0 in the drop down.

The fastest way to import your Azure AD B2C configuration metadata is to scroll down to the bottom and import it via a URL. Your B2C metadata is available at a link like below. You need to replace ‘yourtenant’ with your name and also your B2C policy name (B2C_1A_…). This will fill out the authorize and token endpoints and the Issuer.
https://yourtenant.b2clogin.com/yourtenant.onmicrosoft.com/B2C_1A_signup_signin/v2.0/.well-known/openid-configuration
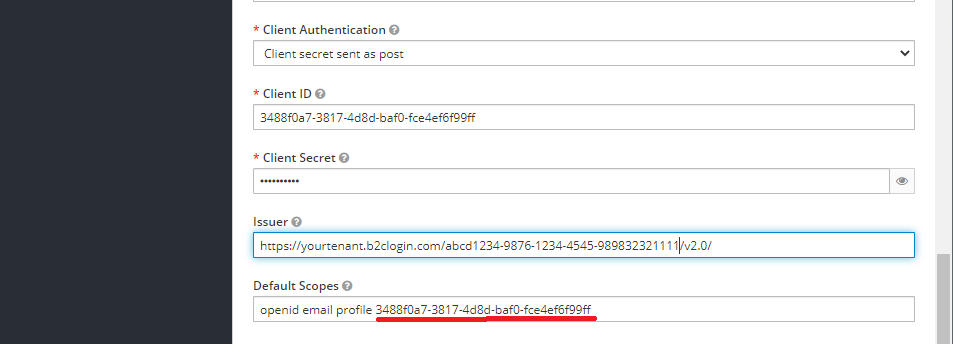
The Display Name will be what is presented in the KeyCloak UX on the button for the federation. The other entries to fill out are the Client ID, Client Secret and the Scopes. The thing to pay attention to is the Scopes entry. You can add the standard openid, email and profile entries so we get the id_token back from B2C. KeyCloak expects an access_token from the federated OIDC identity provider and the way B2C works is that you don’t get an access_token unless you ask for it. Adding the the client id as a scope will make B2C generate an access token too. If you don’t do this, KeyCloak will display the error 502 Bad Gateway in the browser, but in the console log you will see an exception complaining about that there is no access_token.

App registration in Azure AD B2C
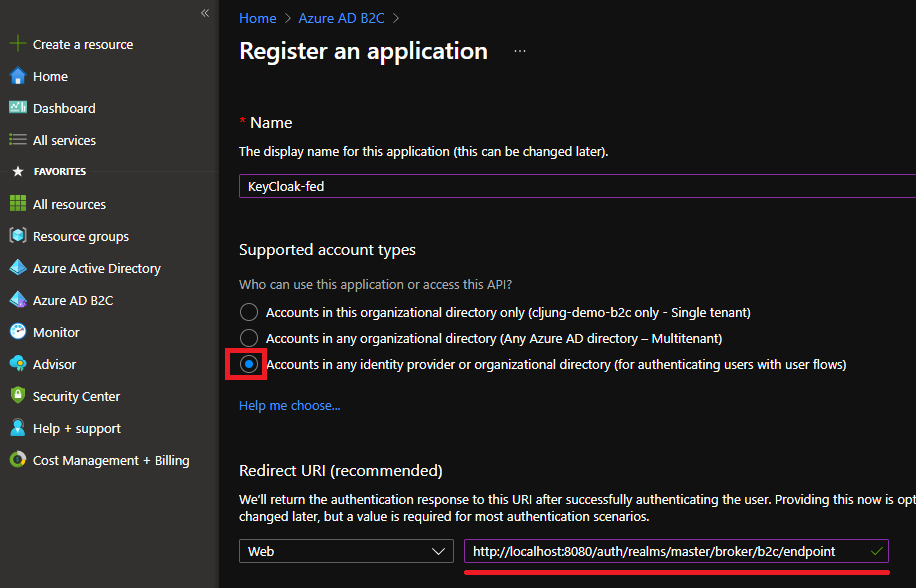
You need to register an application in Azure AD B2C to get the Client ID mentioned above. This is very simple and you just do +New Application in the B2C portal, give it a name and make sure the last account type is selected. It says “user flows” which means B2C policies. The redirect uri can be found in the KeyCloak admin UX, so you just copy that and paste in here. After you have saved, you need create an app secret also, but after that, you are done.

Testing
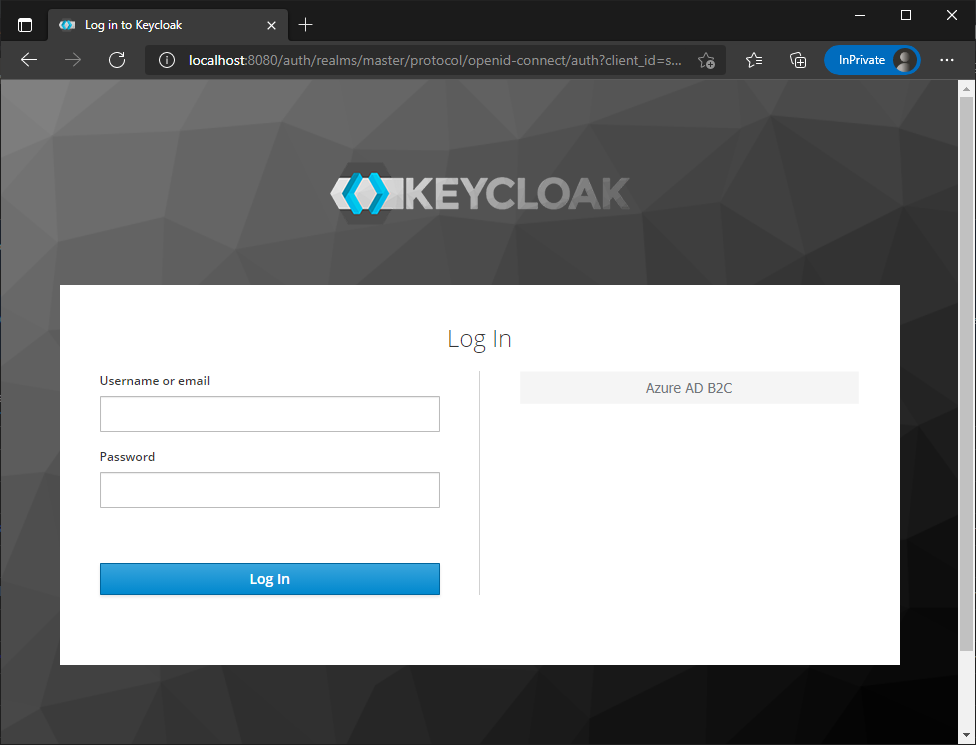
To test the federation, you can open a browser and navigate to http://localhost:8080/auth/admin/master/console (change master to something else if you are using a Realm). This will bring up the KeyCloak UX with the Azure AD B2C button for the federation. Finally, on the Identity Provider in KeyCloak, you have a tab named ‘Mappers’ where you can define which claims from B2C you want to pick up in KeyCloak.
