Deploying code to Azure App Services is simple and nothing new and Python is an interpreted language, which means it can’t be that hard to deploy a Python app, right? Well, if your app has some requirements that needs to be installed, you need to get “pip install” to run on the App Services side. I will explain how you do that.
Recent changes to keep track of
First, Python support is deprecated on App Services on Windows and Linux is the supported environment going forward if you read the docs. This isn’t a major change but it means you need to brush up your deployment scripts so that they create a Linux based App Plan.
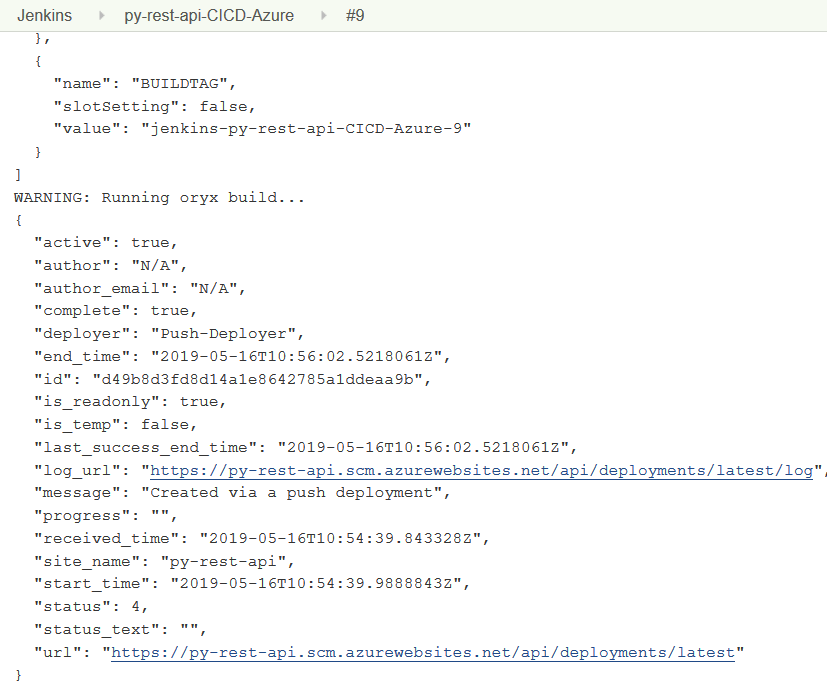
Second, the App Services team have rebuilt the build system inside the Kudo SCM of App Services. The new build system is called Oryx. This isn’t a major change either, but it is worth becoming familiar with it because it will help you troubleshoot failing deployments. It is Oryx that will receive the zip deployment of your app and do post processing such as “pip install -r requirements” in case of a Python app.
Deployment techniques
Deployment techniques in Microsoft’s documentation consists of using the CLI command “az webapp up” or setting up continuous deployment via a github repository. The “az webapp up” is a beginners approach that does a all-in-one deployment that isn’t very well suited for CI/CD pipelines. For instance it currently wacks all app settings during deployment which as we shall see below is a major problem for us. The technique of setting up continous deployment in App Services means that it will be SCM detecting git commits and do the build/deploy.
I want to use Azure DevOps or Jenkins and the deployment technique used must be able to run inside these tools. For this reason I’m going to stick to Azure CLI commands and do a zip deploy. To instruct the new Oryx build that I need it’s help I’m going to set an app setting of name SCM_DO_BUILD_DURING_DEPLOYMENT to true. When the runtime of the App Services app is set to Python, Oryx will then run the “pip install -r requirements.txt” command for me.
Sample Python app
The sample Python app will be the same as in the previous blog post, ie a REST API implementing authorization using an access token issued by Azure AD. You’ll find the code here
https://github.com/cljung/py-rest-api/ .
The Python app has a few dependencies, where asn1crypto, cryptography and cffi, for instance, has to do with that the sample app uses RSA256 cryptography to decode a JWT token. These libraries do not exist on vanilla Linux App Service and we need to install them. On your local laptop you would run “pip install -r requirements.txt” and this we need to make happen in the App Services during deployment.
asn1crypto==0.24.0
cffi==1.11.5
cryptography==2.3.1
idna==2.7
pycparser==2.19
PyJWT==1.6.4
six==1.11.0
requests==2.21.0
cryptography==2.3.1
Flask==1.0.2
Werkzeug==0.14.1
gevent==1.4.0
configparser==3.7.4
In the deploy folder, there is a bash script named az-webapp-create-py.sh that I will use in both Azure DevOps and in Jenkins. It creates the resource group, app plan and app if it doesn’t exist already, zips the code and deploys it to Azure.
rm -f ./deploy.zip
zip -r ./deploy.zip $ZIPFOLDER

# create the RG if it doesn't exists
if [ $(az group exists -n $AZRGNAME) == 'false' ]; then
    echo "create ResourceGroup=$AZRGNAME"
    az group create -n $AZRGNAME -l "$AZLOCATION"
fi

# create the AppService Plan if it doesn't exists
VAR0=$(az appservice plan show -n "$AZAPPPLAN" -g "$AZRGNAME" --query "name" -o tsv)
if [ -z "$VAR0" ]; then
    echo "create AppPlan=$AZAPPPLAN"
    az appservice plan create -g "$AZRGNAME" -n "$AZAPPPLAN" -l "$AZLOCATION" --is-linux --sku FREE #B1
fi

# create the AppService if it doesn't exists
VAR0=$(az webapp show -n "$AZAPPNAME" -g "$AZRGNAME" --query "defaultHostName" -o tsv )
if [ -z "$VAR0" ]; then
    echo "create AppService=$AZAPPNAME"
    az webapp create -g "$AZRGNAME" -p "$AZAPPPLAN" -n "$AZAPPNAME" -r "python|3.7"
    az webapp config set -g "$AZRGNAME" -n "$AZAPPNAME" --min-tls-version 1.2 --linux-fx-version "PYTHON|3.7"
    az webapp log config -g "$AZRGNAME" -n "$AZAPPNAME" --web-server-logging filesystem --docker-container-logging filesystem
fi

az webapp config appsettings set -g "$AZRGNAME" -n "$AZAPPNAME" --settings "SCM_DO_BUILD_DURING_DEPLOYMENT=true" "AZTENANTID=$AZTENANTID" "AZAPPID=$AZAPPID"
az webapp deployment source config-zip -g "$AZRGNAME" -n "$AZAPPNAME" --src ./deploy.zip
The trick is in the last two lines where we add SCM_DO_BUILD_DURING_DEPLOYMENT first and then do the zip deployment. If you deploy a Python app without this setting, the zip deployment will succeed but your Python app will throw an error since all requirements are not installed. With this setting, the requirements.txt file will be processed during deployment.

Azure DevOps
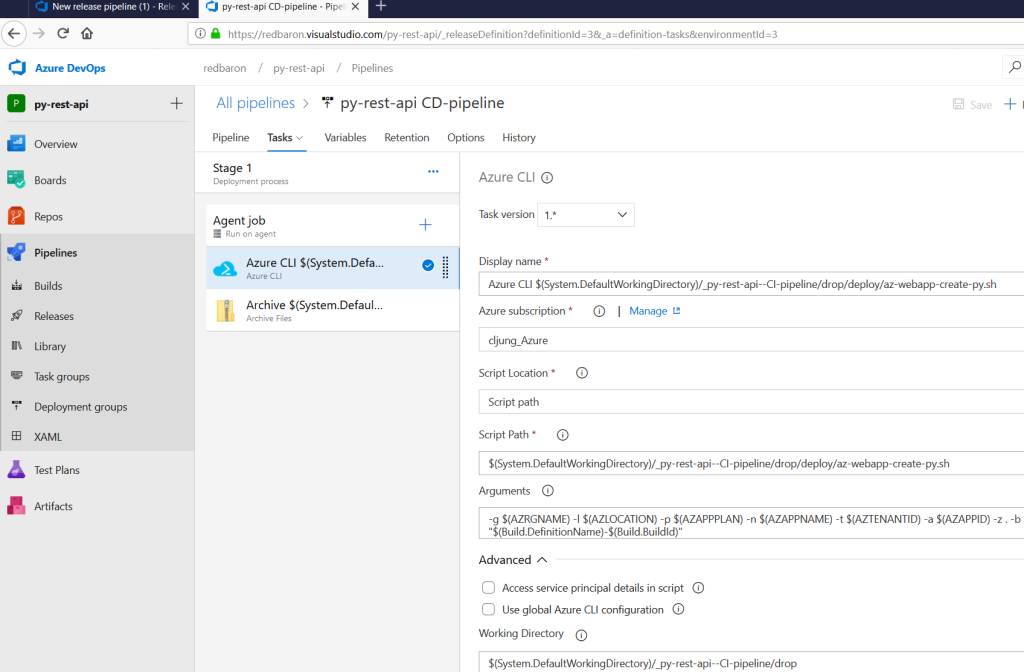
To deploy the Python app in an Azure DevOps release pipeline can be done via adding prebuilt tasks, but here I use an Azure CLI task where I execute the bash script. The arguments, like name of the Resource Group, App Name, etc, is defined as Variables.

Jenkins Pipeline
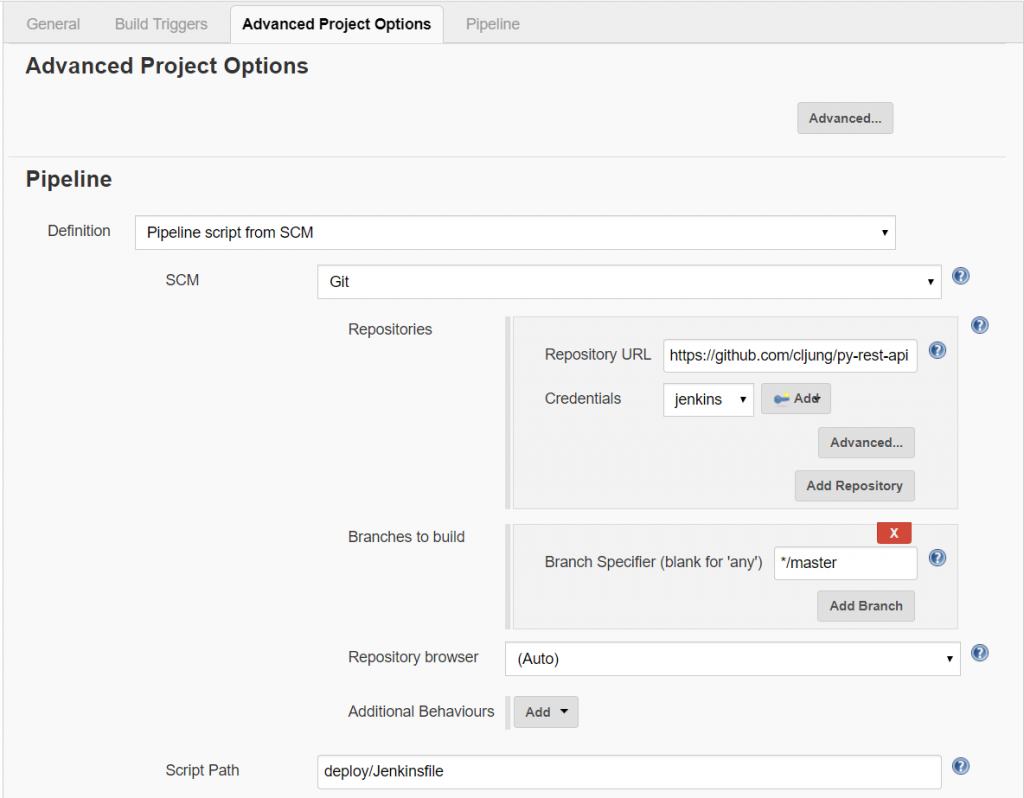
The script can be reused if you are using Jenkins for your CI/CD pipeline. If you create a Pipeline item, you control the build via the Jenkinsfile that exists in the deploy folder.

The build relies on variables that you need to define in the Jenkins pipeline configuration. It then sets these as environment variables that can be picked up by the script. The Deploy stage in Jenkinsfile logs in to Azure via a service principal “az login –service-principal” and then invokes the same deployment script
pipeline {
    agent any
    environment {
        AZRGNAME = "${params.AZRGNAME}"
        AZLOCATION = "${params.AZLOCATION}"
        AZAPPPLAN = "${params.AZAPPPLAN}"
        AZAPPNAME = "${params.AZAPPNAME}"
        AZTENANTID = "${params.AZTENANTID}"
        AZAPPID = "${params.AZAPPID}"
    }
    stages {
        stage('Deploy') {
            steps {
                withCredentials([azureServicePrincipal('AzureServicePrincipalID')]) {
                    sh 'az login --service-principal -u $AZURE_CLIENT_ID -p $AZURE_CLIENT_SECRET -t $AZURE_TENANT_ID'
                    sh 'az account set -s $AZURE_SUBSCRIPTION_ID'
                    sh 'chmod +x ./deploy/az-webapp-create-py.sh'
                    sh './deploy/az-webapp-create-py.sh -z . -b $BUILD_TAG'
                }
            }
        }
    }
}
