The forth post in a series of 8 in my hands-on tech training will be about Azure Virtual Machines. VMs is probably one of the most documented and blogged about resources in Azure, so it’s a pretty vanilla subject. I’ll try to highlight the differences between how Powershell and the CLI helps you provisioning a VM. The VM we will create will be a Ubuntu VM that we will use as our dev/build VM in episode 5 on Containers and Azure Kubernetes Services.
What Azure resources a VM consists of
In the old Classic days of Azure, a VM was created with lots of defaults surrounding it, like a virtual network being just there for your machine, a NIC auto-provisioned for you (how did you get a 2nd one?). With the move to the ARM model (Azure Resource Manager), creating a VM became the art of provisioning everything yourself, much like assembling your new furniture you bought from IKEA.
An Azure VM consists of the following
- Storage – where to put your virtual hard disks
- The VM itself
- Network Interface card(s) – you must have 1, but can have more
- Virtual Network
- Network Security Group – protecting access to the VM/VNet. Optional, yes, but you’d be a fool not to use it
- Public ip address – optional if you just reach it internally via the VNet
and if we are talking about a cluster of machines we can add even more things like Load Balancer, Availability Sets, etc etc.
Provision a VM with CLI
CLI takes the approach of doing as much as it can for you so you don’t need to specify all things it can figure out for itself. The code below is pretty short compared to what we will see in Powershell later. The az vm create does alot of things, like creating the Storage Account, the NIC, the VNet and the Public ip address. It even creates the Network Security Group and opens port 22 for us since it sees that we are creating a Linux VM. What remains for us is to open the additional ports we want.
_PIP=$(curl http://ipinfo.io/ip)
# create the RG
az group create --location westeurope --name "$rgname"

# create the VM
az vm create --resource-group "$rgname" --name "$vmname" --image "UbuntuLTS"
     --admin-username "$USER" --admin-password "$vmpwd"
     --use-unmanaged-disk --size "Standard_D1_v2"
     --storage-account "$(echo $vmname)stg" --storage-sku "Standard_LRS"

# open the firewall so we can browse to various things the demo needs
nsgname="$(echo $vmname)NSG"
az network nsg rule create --resource-group "$rgname" --nsg-name "$nsgname"
           --name "Port_80" --access allow --protocol Tcp --direction Inbound
           --priority 110 --source-address-prefix "$_PIP" --source-port-range "*"
           --destination-address-prefix "*" --destination-port-range 80
az network nsg rule create --resource-group "$rgname" --nsg-name "$nsgname"
           --name "Port_8080" --access allow --protocol Tcp --direction Inbound
           --priority 120 --source-address-prefix "$_PIP" --source-port-range "*"
           --destination-address-prefix "*" --destination-port-range 8080
To automatically install all the needed tools on the VM, we want the script ubuntu-install-devtools.sh to run during the creation process. That is achieved by using the Azure VM Extension
# run the installation script to setup the VM
az vm extension set --resource-group "$rgname" --vm-name "$vmname" --name "customScript"
   --publisher "Microsoft.Azure.Extensions"
   --protected-settings
    '{"fileUris":["https://raw.githubusercontent.com/cljung/aztechdays/master/ubuntu-install-devtools.sh"],"commandToExecute":"./ubuntu-install-devtools.sh '$userid'"}'
Provsion a VM with Powershell
The Powershell version of provisioning a VM has the option of filling in all the default for you, but the problem is that it assumes too much in our case. For instance, the default is a Windows Server 2016 and we want a Ubuntu Linux OS. In order to get what we want we need to do this piece by piece.
New-AzureRmResourceGroup -Name "$rgname" -Location "$location"

# Create a new storage account - use Standard_LRS to save a few $$
$StorageAccount = New-AzureRMStorageAccount -Location "$location" -ResourceGroupName "$rgname"
                      -Type "Standard_LRS" -Name "$StorageAccountName"
# Create a storage container to store the virtual machine image
$container = New-AzureStorageContainer -Name "vhds" -Permission "Blob"
                        -Context  $StorageAccount.Context
# Create a subnet configuration
$subnetConfig = New-AzureRmVirtualNetworkSubnetConfig -Name "mySubnet"
                       -AddressPrefix $vnetAddressPrefix
# Create a virtual network
$vnet = New-AzureRmVirtualNetwork -ResourceGroupName "$rgname" -Location "$location"
          -Name "$vnetname" -AddressPrefix $subnetAddressPrefix -Subnet $subnetConfig

# Create a public IP address and specify a DNS name
$pip = New-AzureRmPublicIpAddress -ResourceGroupName "$rgname" -Location "$location"
                -Name "$pipname" -AllocationMethod "Dynamic"

# get our current public ip addr so we can set the NSG below to only allow access from that ip addr
$resp = Invoke-RestMethod "http://ipinfo.io"
$PIPADDR=$resp.ip

# Create an inbound network security group rule for port 22
$nsg22 = New-AzureRmNetworkSecurityRuleConfig -Name "Port_SSH" -Protocol Tcp -Direction Inbound
            -Priority 100 -SourceAddressPrefix "$PIPADDR" -SourcePortRange *
            -DestinationAddressPrefix * -DestinationPortRange 22 -Access Allow
$nsg80 = New-AzureRmNetworkSecurityRuleConfig -Name "Port_80" -Protocol Tcp -Direction Inbound
            -Priority 120 -SourceAddressPrefix "$PIPADDR" -SourcePortRange *
            -DestinationAddressPrefix * -DestinationPortRange 80 -Access Allow
$nsg8080 = New-AzureRmNetworkSecurityRuleConfig -Name "Port_8080" -Protocol Tcp -Direction Inbound
            -Priority 140 -SourceAddressPrefix "$PIPADDR" -SourcePortRange *
            -DestinationAddressPrefix * -DestinationPortRange 8080 -Access Allow
# Create a network security group
$nsg = New-AzureRmNetworkSecurityGroup -ResourceGroupName "$rgname" -Location "$location"
            -Name "$nsgname" -SecurityRules $nsg22,$nsg80,$nsg88,$nsg8080

# Create a virtual network card and associate with public IP address and NSG
$nic = New-AzureRmNetworkInterface -Name "$nicname" -ResourceGroupName "$rgname"
            -Location "$location" -SubnetId $vnet.Subnets[0].Id -PublicIpAddressId $pip.Id
            -NetworkSecurityGroupId $nsg.Id

# set some various VM config
$osDiskUri = '{0}vhds/{1}-osdisk.vhd' -f $StorageAccount.PrimaryEndpoints.Blob.ToString(), $vmname.ToLower()
$vmConfig = New-AzureRmVMConfig -VMName $vmname -VMSize "Standard_D1_v2" | `
    Set-AzureRmVMOperatingSystem -Linux -ComputerName "$vmname" -Credential $cred | `
    Set-AzureRmVMSourceImage -PublisherName "Canonical" -Offer "UbuntuServer" -Skus "16.04-LTS"
                             -Version "latest" | `
    Add-AzureRmVMNetworkInterface -Id $nic.Id | `
    Set-AzureRmVMOSDisk -Name "$($vmname)-osdisk" -VhdUri $OsDiskUri -CreateOption FromImage | `
    Set-AzureRmVMBootDiagnostics -Disable

# Create a virtual machine
New-AzureRmVM -ResourceGroupName "$rgname" -Location "$location" -VM $vmConfig
We start with creating the Storage Account, then the VNet and the Public ip address, since they are all independent of the rest. Then we create the NSGs, allowing port 22, 80 and 8080 before we create the NIC, since we attach the NSG to the NIC. The New-AzureRmVmConfig part is where we all all details about the VM, and finally we invoke New-AzureRmVm to do the heavy lifting of provisioning.
Running the bash script ubuntu-install-devtools.sh is done the same way, ie using the VM extension.
$settings = @{
   "fileUris"=@("https://raw.githubusercontent.com/cljung/aztechdays/master/ubuntu-install-devtools.sh");
   "commandToExecute"="bash ./ubuntu-install-devtools.sh '$userid'"
};
Set-AzureRmVMExtension -ResourceGroupName $rgname -VMName $vmname -Name "CustomScriptforLInux"
                        -Publisher "Microsoft.Azure.Extensions" `
                        -TypeHandlerVersion 2.0 -ExtensionType "CustomScript"
                        -Location $location -Settings $settings -WarningAction SilentlyContinue
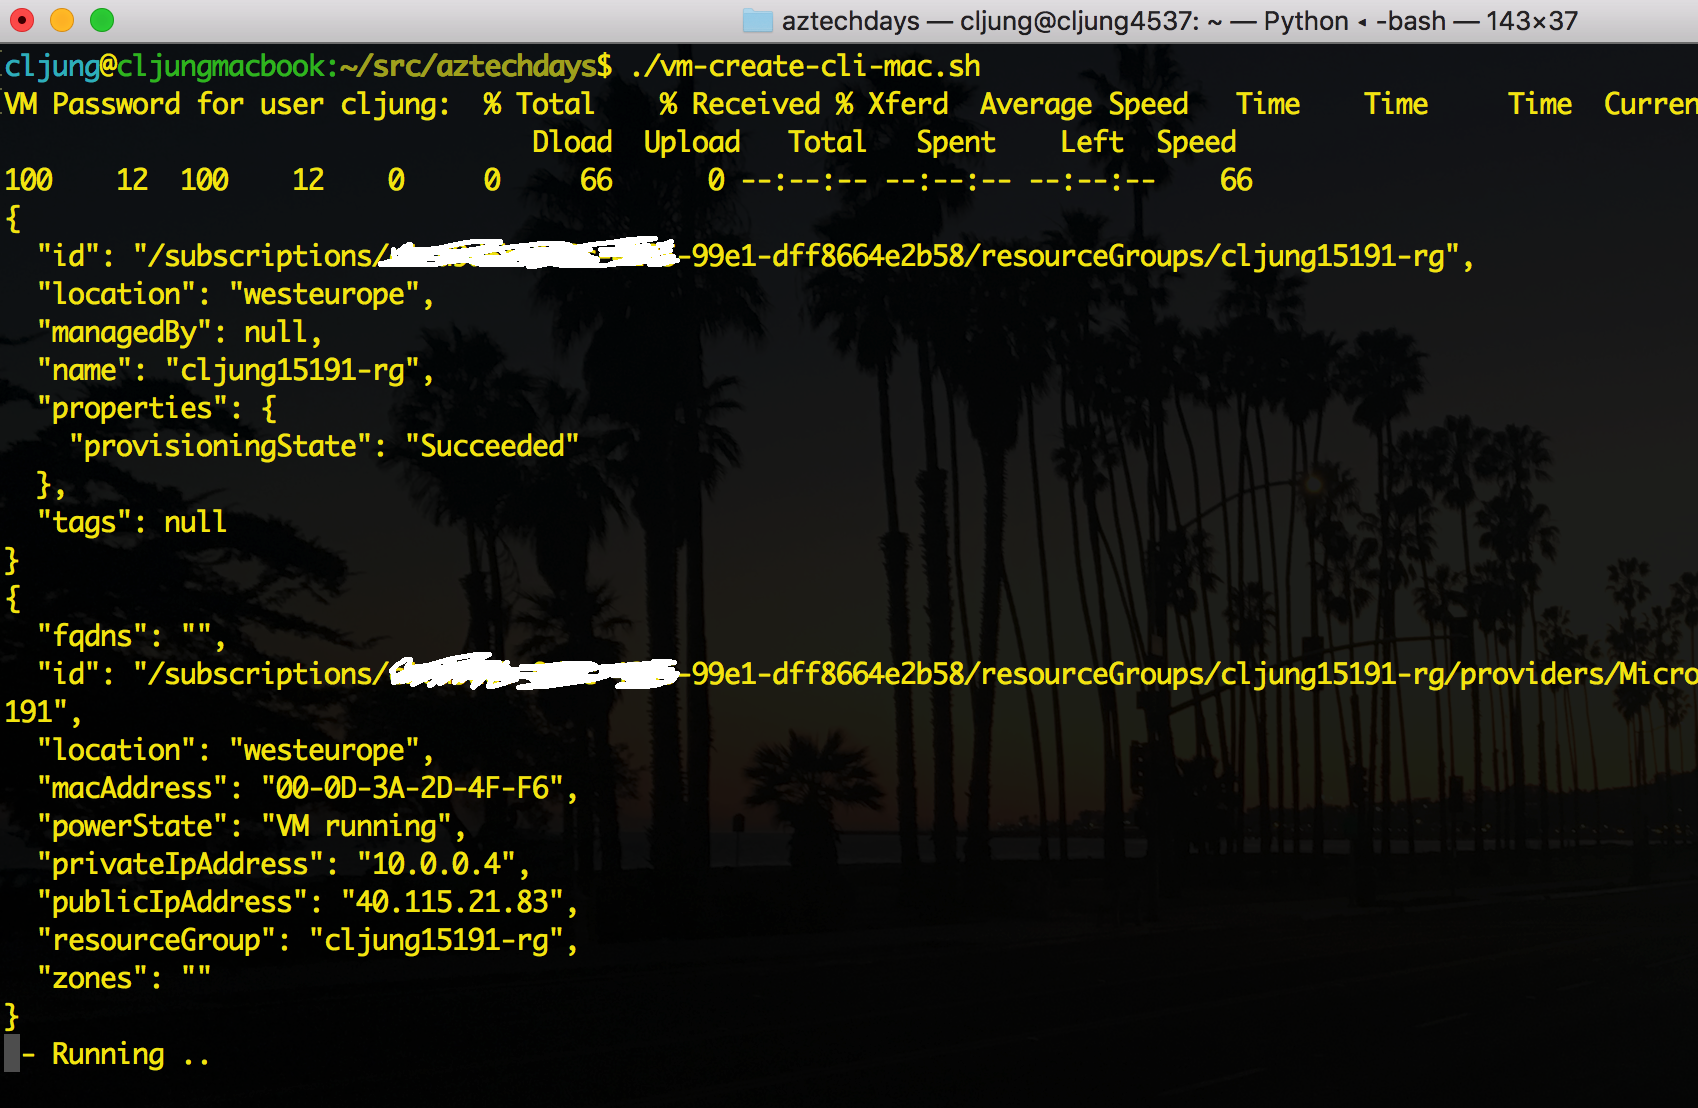
Running the script gives you this output
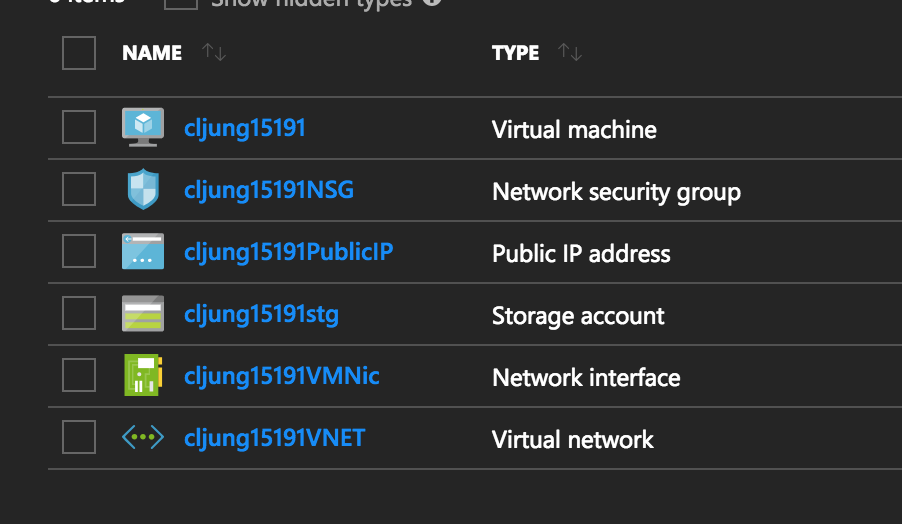
and produces these resources in Azure. As you can see, the CLI gives resources their names by appending “VMNic” to the VM name when creating the NIC, etc. It does a decent job, but if you don’t like these names, you have to provision the resources piece by piece in CLI just like you do in Powershell. You trade some flexibility here.
Custom Script Extension
The bash script ubuntu-install-devtools.sh is executed during the creation of the VM by the agent present on the VM (called waagent). All OS images that are provided in the Azure Marketplace have this agent preinstalled. It is the agent that helps you in cases you need to reset the password, so don’t uninstall it unless you have very special needs.
If you look at the bash script file in Github, you’ll see that it installs the following software on tthe Ubuntu VM:
- Git client
- Azure CLI
- Docker
- Docker-compose
- Kubectl Kubernetes client
The reason for installing all this is that it is all components we need for the Containers/Kubernetes exercise. Theoretically, you could install it on your own laptop, but I find it easier to have a small lab VM that I can play with when trying out new things. The script also creates a secondary script file, named download-azure-container-script.sh, that you are going to use in the next Container. It will be located in your home directory.
Summary
This post illustrates the steps needed to provision a VM in Azure and running an installation command at creation time. It is in no way unique but rather from a scripting beginners perspective. It will create a VM that can be used for building a Container Application running on Azure Kubernetes Services.
References
The scripts references can be found here https://github.com/cljung/aztechdays
There are three main scripts:
- vm-create-cli-mac.sh – CLI for Mac
- vm-create-cli-win.cmd – CLI for DOS/Windows
- vm-create-win.ps1 – Powershell
All scripts make use of the script
- ubuntu-install-devtools.sh

