Moving on to episode 7 in my hands on tech training series we will continue to use Azure Kubernetes Service with VSTS as the CI/CD pipeline, but this time we will build and deploy a .NET Core WebApp. Since .NET Core is cross platform, we will again use Linux as our build agent. I did everything locally on a Mac – Welcome to the new world out there!
The Task
I’m going to do very much the same as is shown in this Channel9 video https://channel9.msdn.com/Events/Build/2018/THR5059 but we add the CD/Release step to and actually deploy it to Azure Kubernetes Service. I will also do the CI/Build a little bit differently. But to start with (as the video describes), you should do the following
- Create a new project in VSTS (Git/Agile)
- Import the existing repo https://github.com/jldeen/build18-dotnet.git
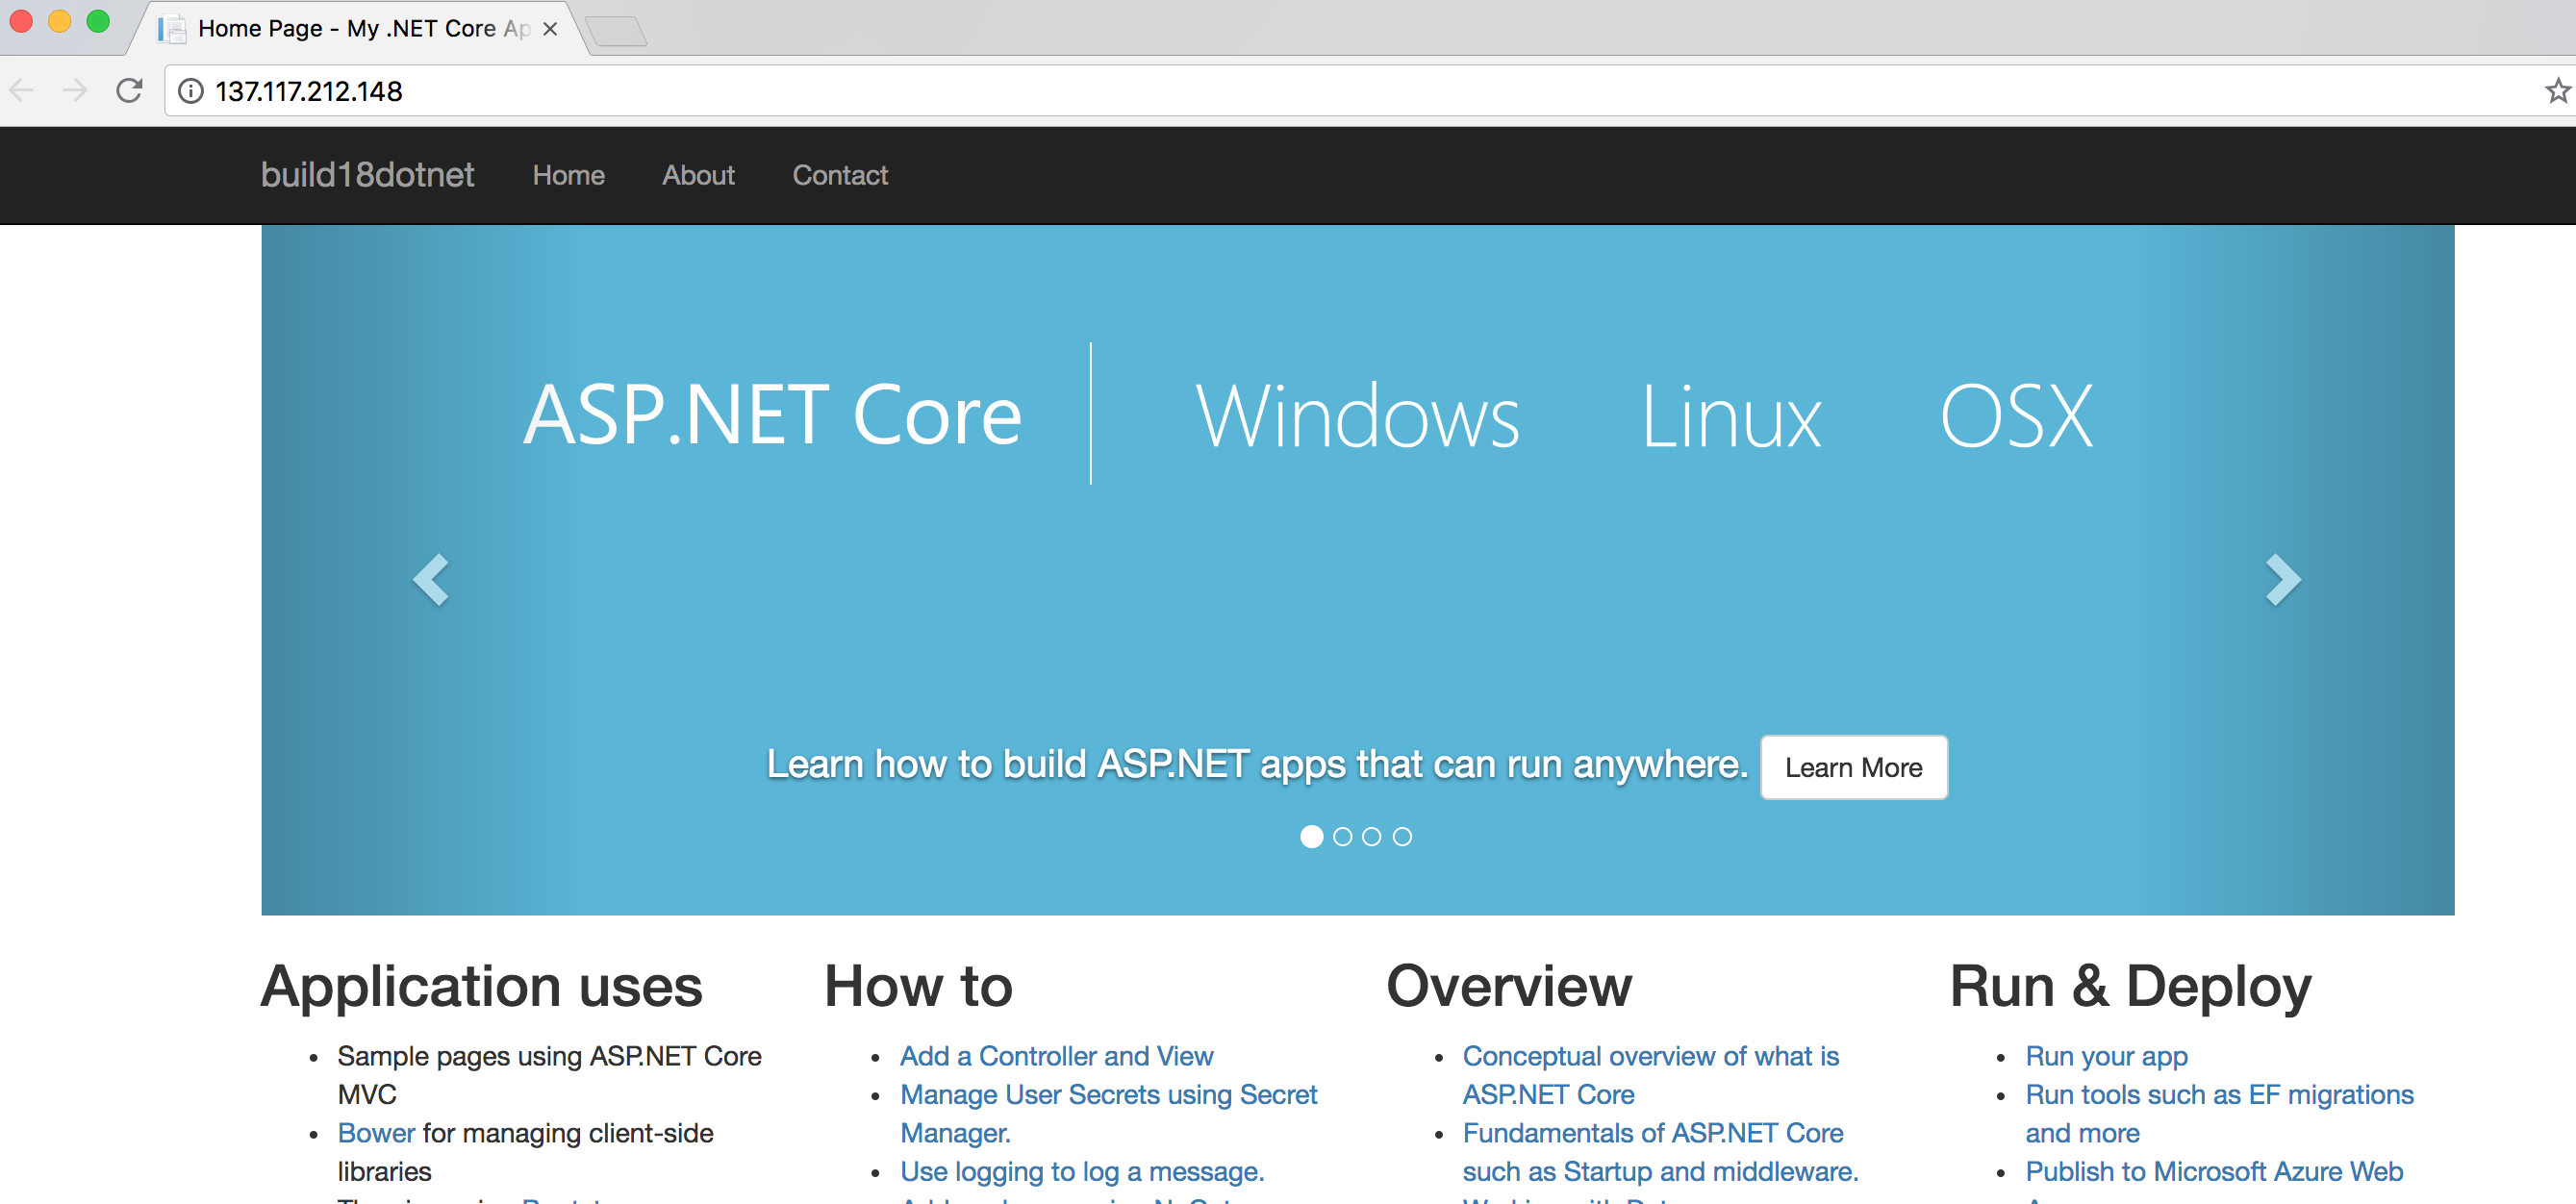
It is a very basic ASP.NET Core MVC WebApp
What we will add as the next steps are
- CI / VSTS Build
- Build the .NET Core WebApp
- Publish the .NET Core WebApp
- Build a docker image of the published output (just the dll, etc)
- Push the docker image to Azure Container Registry (ACR)
- CD / VSTS Release
- Deploy the ACR image to Azure Kubernetes Service
CI / VSTS Build
My build pipeline looks like below. Notice I’m using Hosted Linux as the agent for doing the build. There is a good reason for this and it is because the actual build time is faster that doing it on Hosted VS2017. Ain’t that funny! And if you are like me running this with a limited set of minutes/month, you want your builds short. And since this is .NET Core … why not! I’ve also removed the Test task, since that isn’t needed in this demo build and just consumes time.

To be honest, if I followed the exact instructions in the video, I got an docker image Azure Kubernetes Service wouldn’t/couldn’t run. My suspicion is that the docker build command isn’t correct, but let’s leave it at that.
The CI/Build in plain commands you could execute in the Terminal would look like this
# git clon the repo, cd into dir

dotnet build src/build18dotnet/build18dotnet.csproj --configuration release

dotnet publish src/build18dotnet/build18dotnet.csproj --configuration release --output ./a/build18dotnet

docker build -f src/build18dotnet/Dockerfile -t $ACRLOGINSERVER/build18-dotnet:55 -t $ACRLOGINSERVER/build18-dotnet ./a/build18dotnet

docker run -p 5001:80 $ACRLOGINSERVER/build18-dotnet:latest

docker push $ACRLOGINSERVER/build18-dotnet:latest
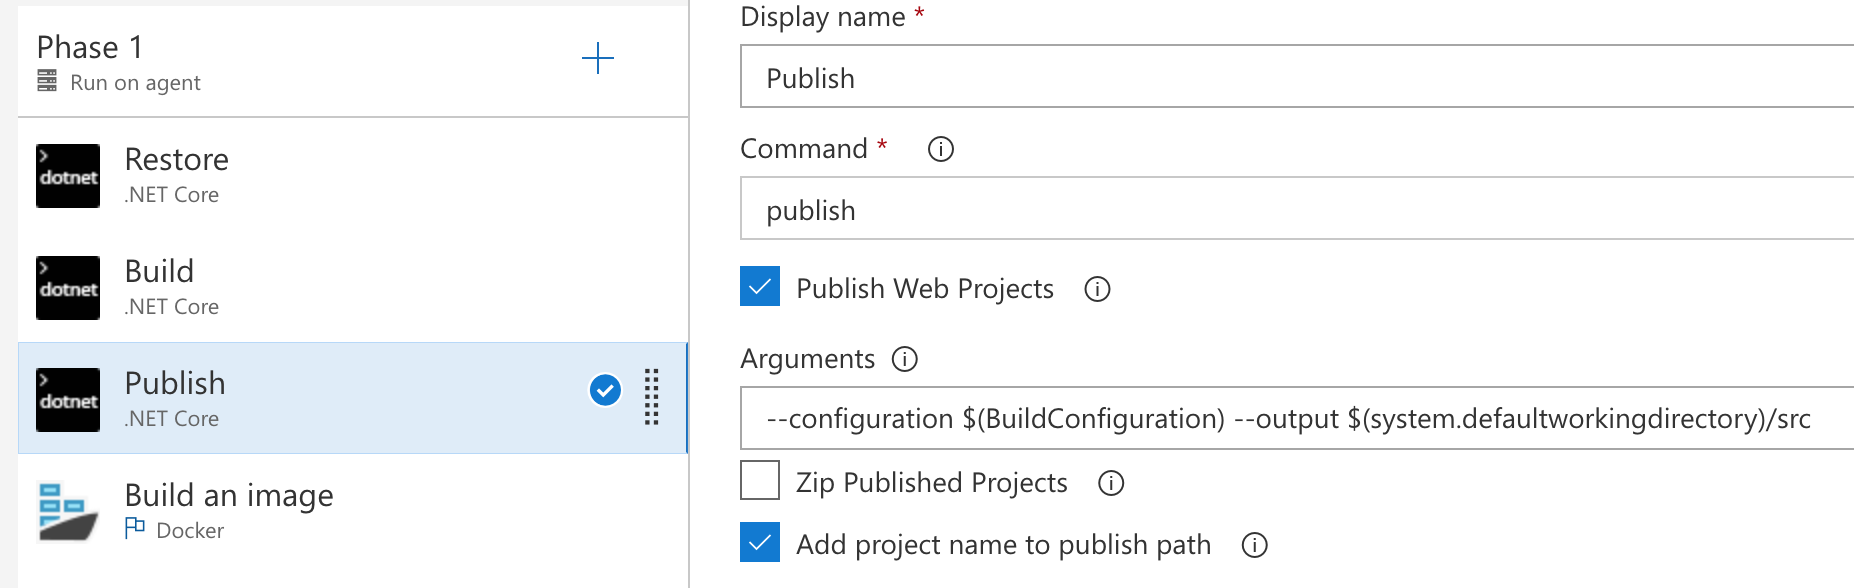
I just want what the output from the “dotnet publish” to be in the Docker image, so therefor I change the –output task parameter like below. The dotnet publish will create a folder after the *.csproj filename so the output of the build will reside in $(System.DefaultWorkingDirectory)/src/builddotnet18. I also unchecked the “Zip Published Projects” since I don’t want zipfile of it all.
When it comes time to do the Docker Build step in the next task, we need to uncheck the “Use Default Build Context” in order to modify what PATH the docker build command use as target (and here is where I think the example in the video goes wrong). I point it to the exact location as the Publish task above put the build output. Not showing in the screenshot below is that the “Include Latest Tag” is checked.
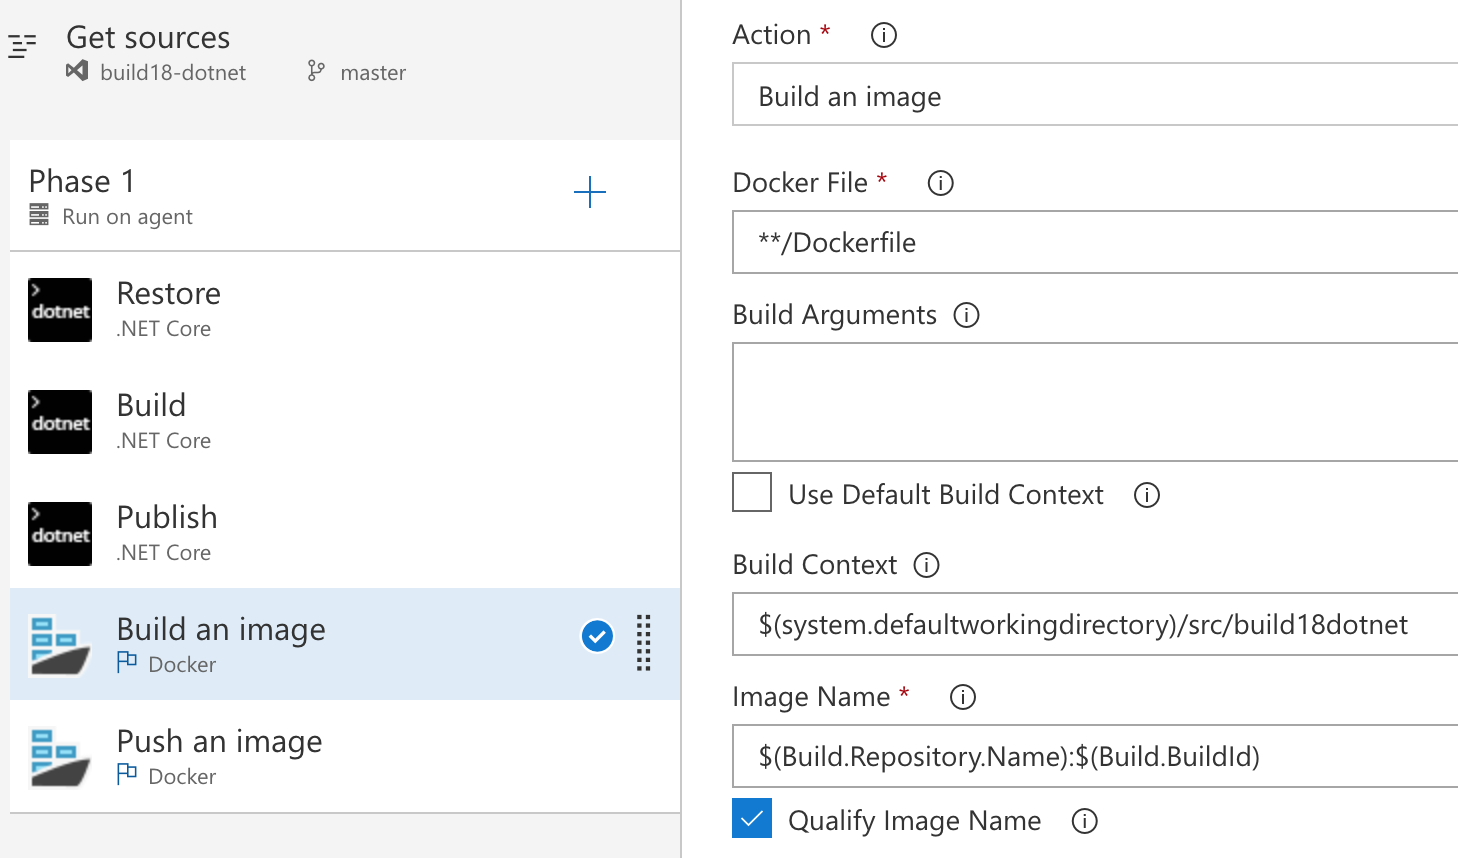
The “Push an image” task is just full of defaults but with Action = “Push an image”. No custom changes there. You need to setup the authentication to your Azure Subscription and point to your Azure Container Registry. You’ll find my notes on that in the middle of the Episode 6a post which describes how to avoid always creating a new Service Principle each and every time.
If you queue the build, it will run pretty fast. On the Hosted Linux, my completed in 94 seconds compared to >10 minutes on Hosted VS2017. 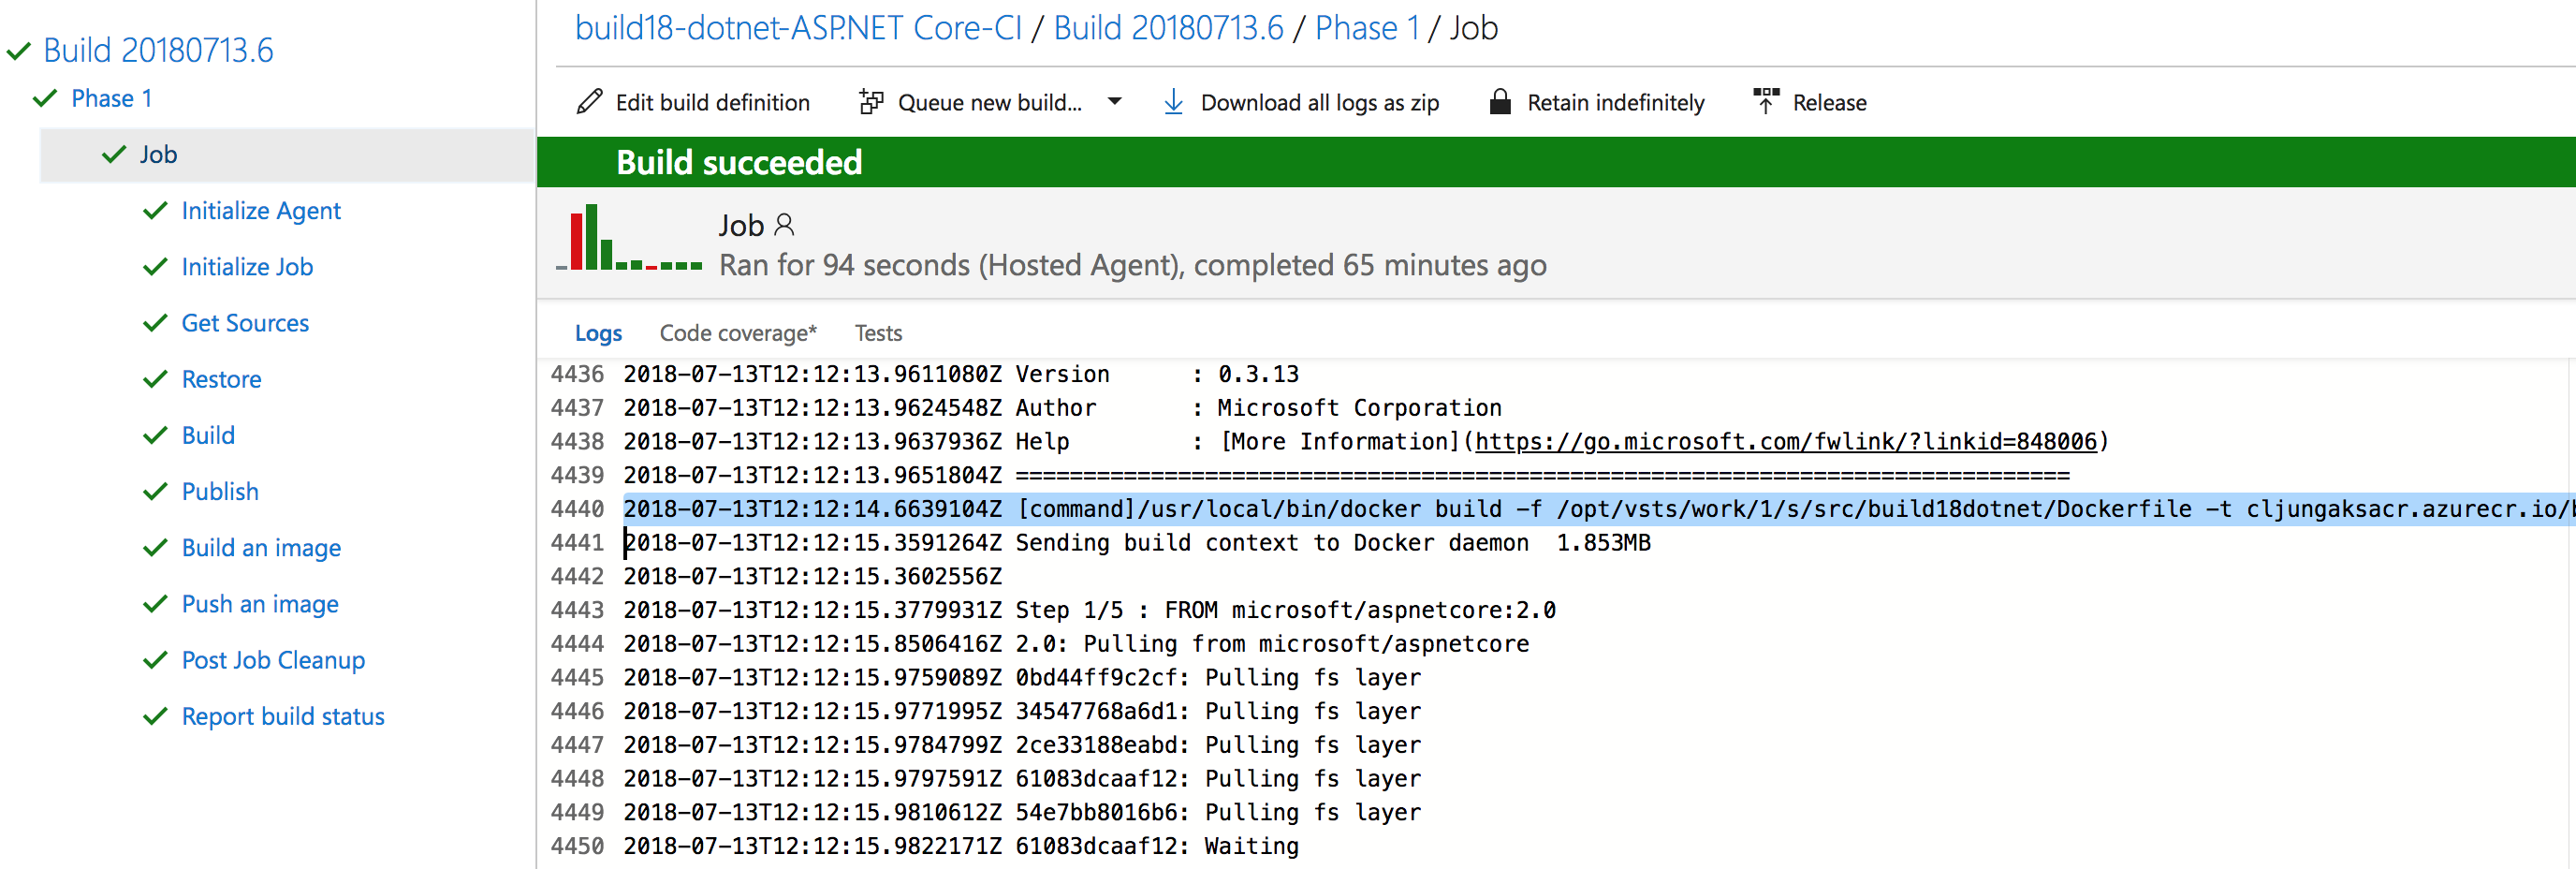
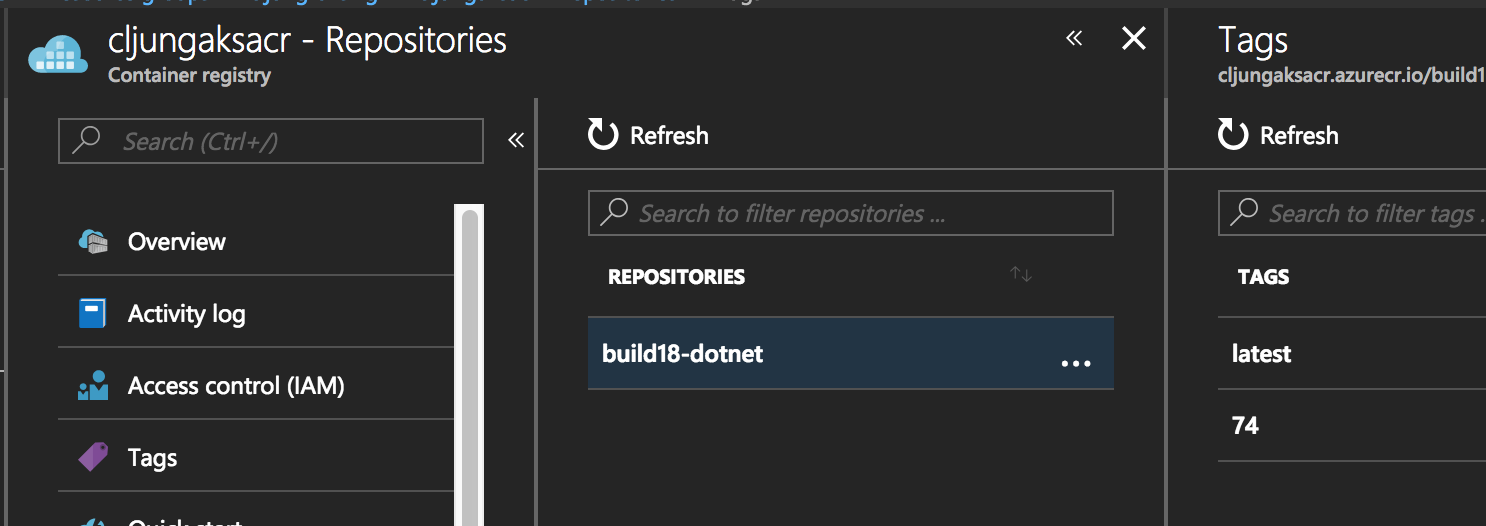
When it completes, you will see the docker image in the Azure Container Registry’s repository in portal.azure.com
CD / VSTS Release
The source code in the git repo we cloned do not come with a YAML file that we can use for deployment to Kubernetes. Instead we have to do it manually in two steps, which in lines of script you could run in the Terminal would look like this.
# deploy the app to k8s
kubectl run build18-dotnet --image $ACRLOGINSERVER/build18-dotnet:latest --port 80

# create the k8s service
kubectl expose deployment build18-dotnet --type=LoadBalancer --port 80 --target-port 80
It is the equivalent of a YAML file containing a Deployment and a Service section.
I hook up the Release pipeline to the drop from the Build phase although nothing is actually dropped from the build – it is pushed to the ACR repository. In another Build conference talk, https://channel9.msdn.com/Events/Build/2018/BRK2142, it is shown how you could trigger the Release phase from hooking that a new push has occurred to ACR. This isn’t really the way I like it, so therefor I stick to a all-VSTS approach.

We add two “Deploy to Kubernetes” tasks to our pipeline. The first will create the Deployment and the second the Service (ip addr and load balancer).
To create the Deployment we select the “kubectl run” command and supply the arguments of the image in the repository and what port the webapp will listen to. As I did in episode 6b, I’ve stored the name of our ACR in a VSTS Variable and reference it here using the $(ACRLOGINSERVER) syntax.
How you configure the “Kubernetes service connection” was also explained in episode 6b, but in short you get the details by running the Azure CLI command “az aks get-credentials” and grab whatever ends up in your $HOME/.kube/config file.

The second step is very much like the first one except that here we invoke the “kubectl expose” command with arguments ”
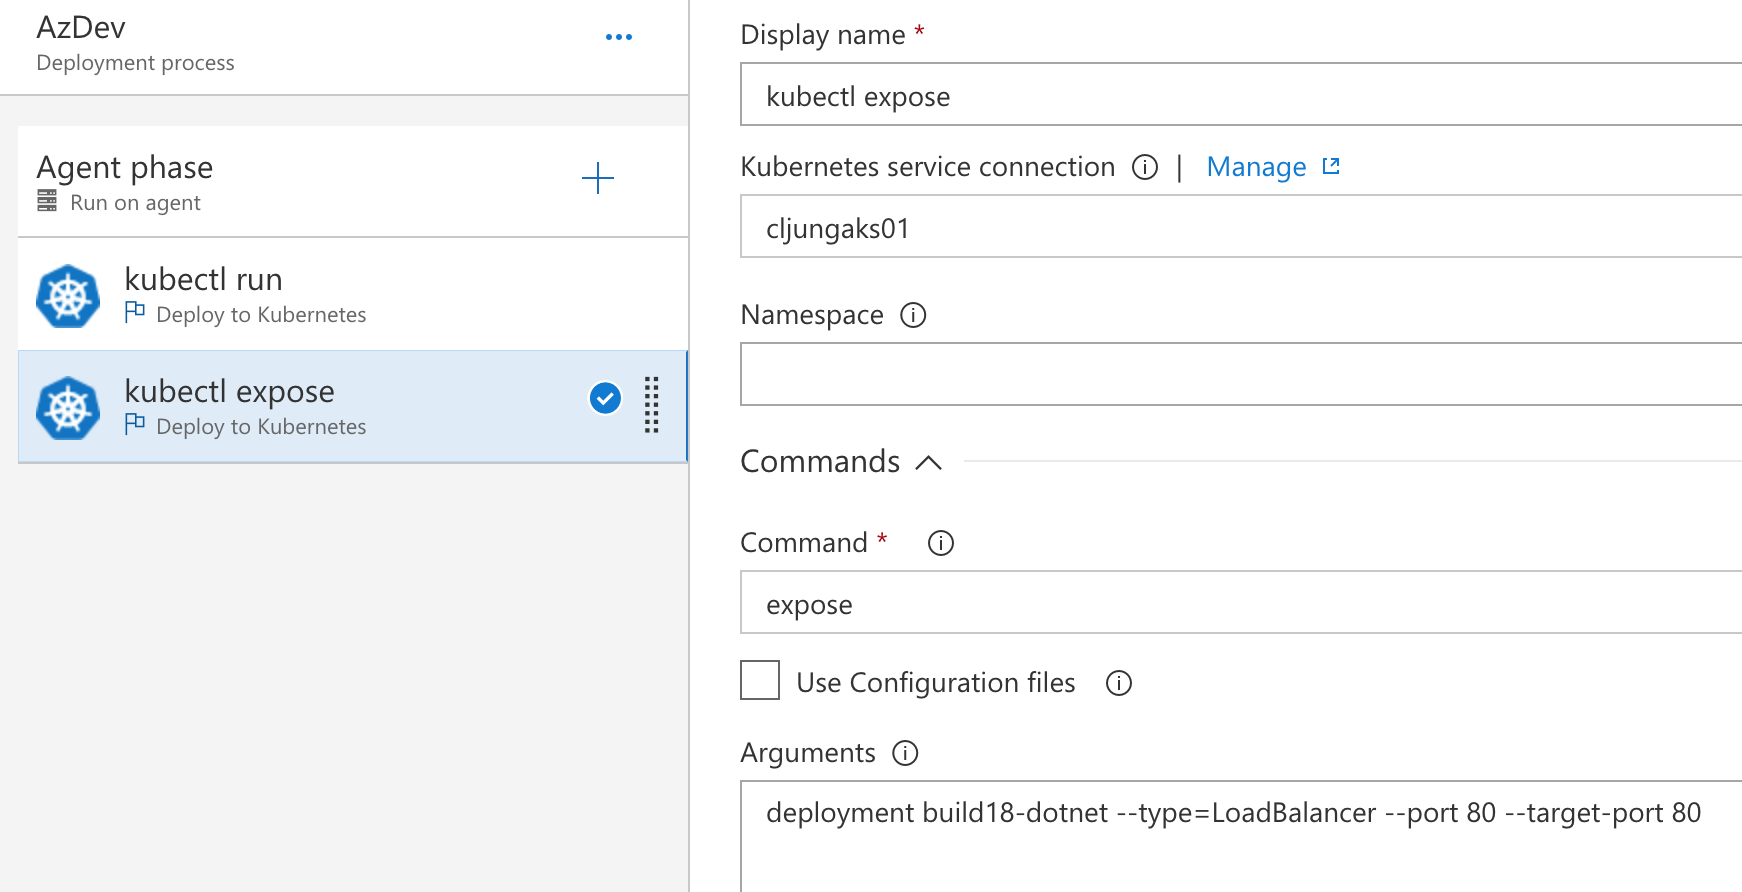
Running a Release will be very fast and only take a couple of seconds. The only errors you’ll encounter here are if your Kubernetes Service Endpoint config data is invalid, but that shouldn’t happen it you did verify the connection before closing that dialog.
After that, it will take some time for Kubernetes to spin up the Pods running the and you can watch it happen it the Kubernetes Dashboard.
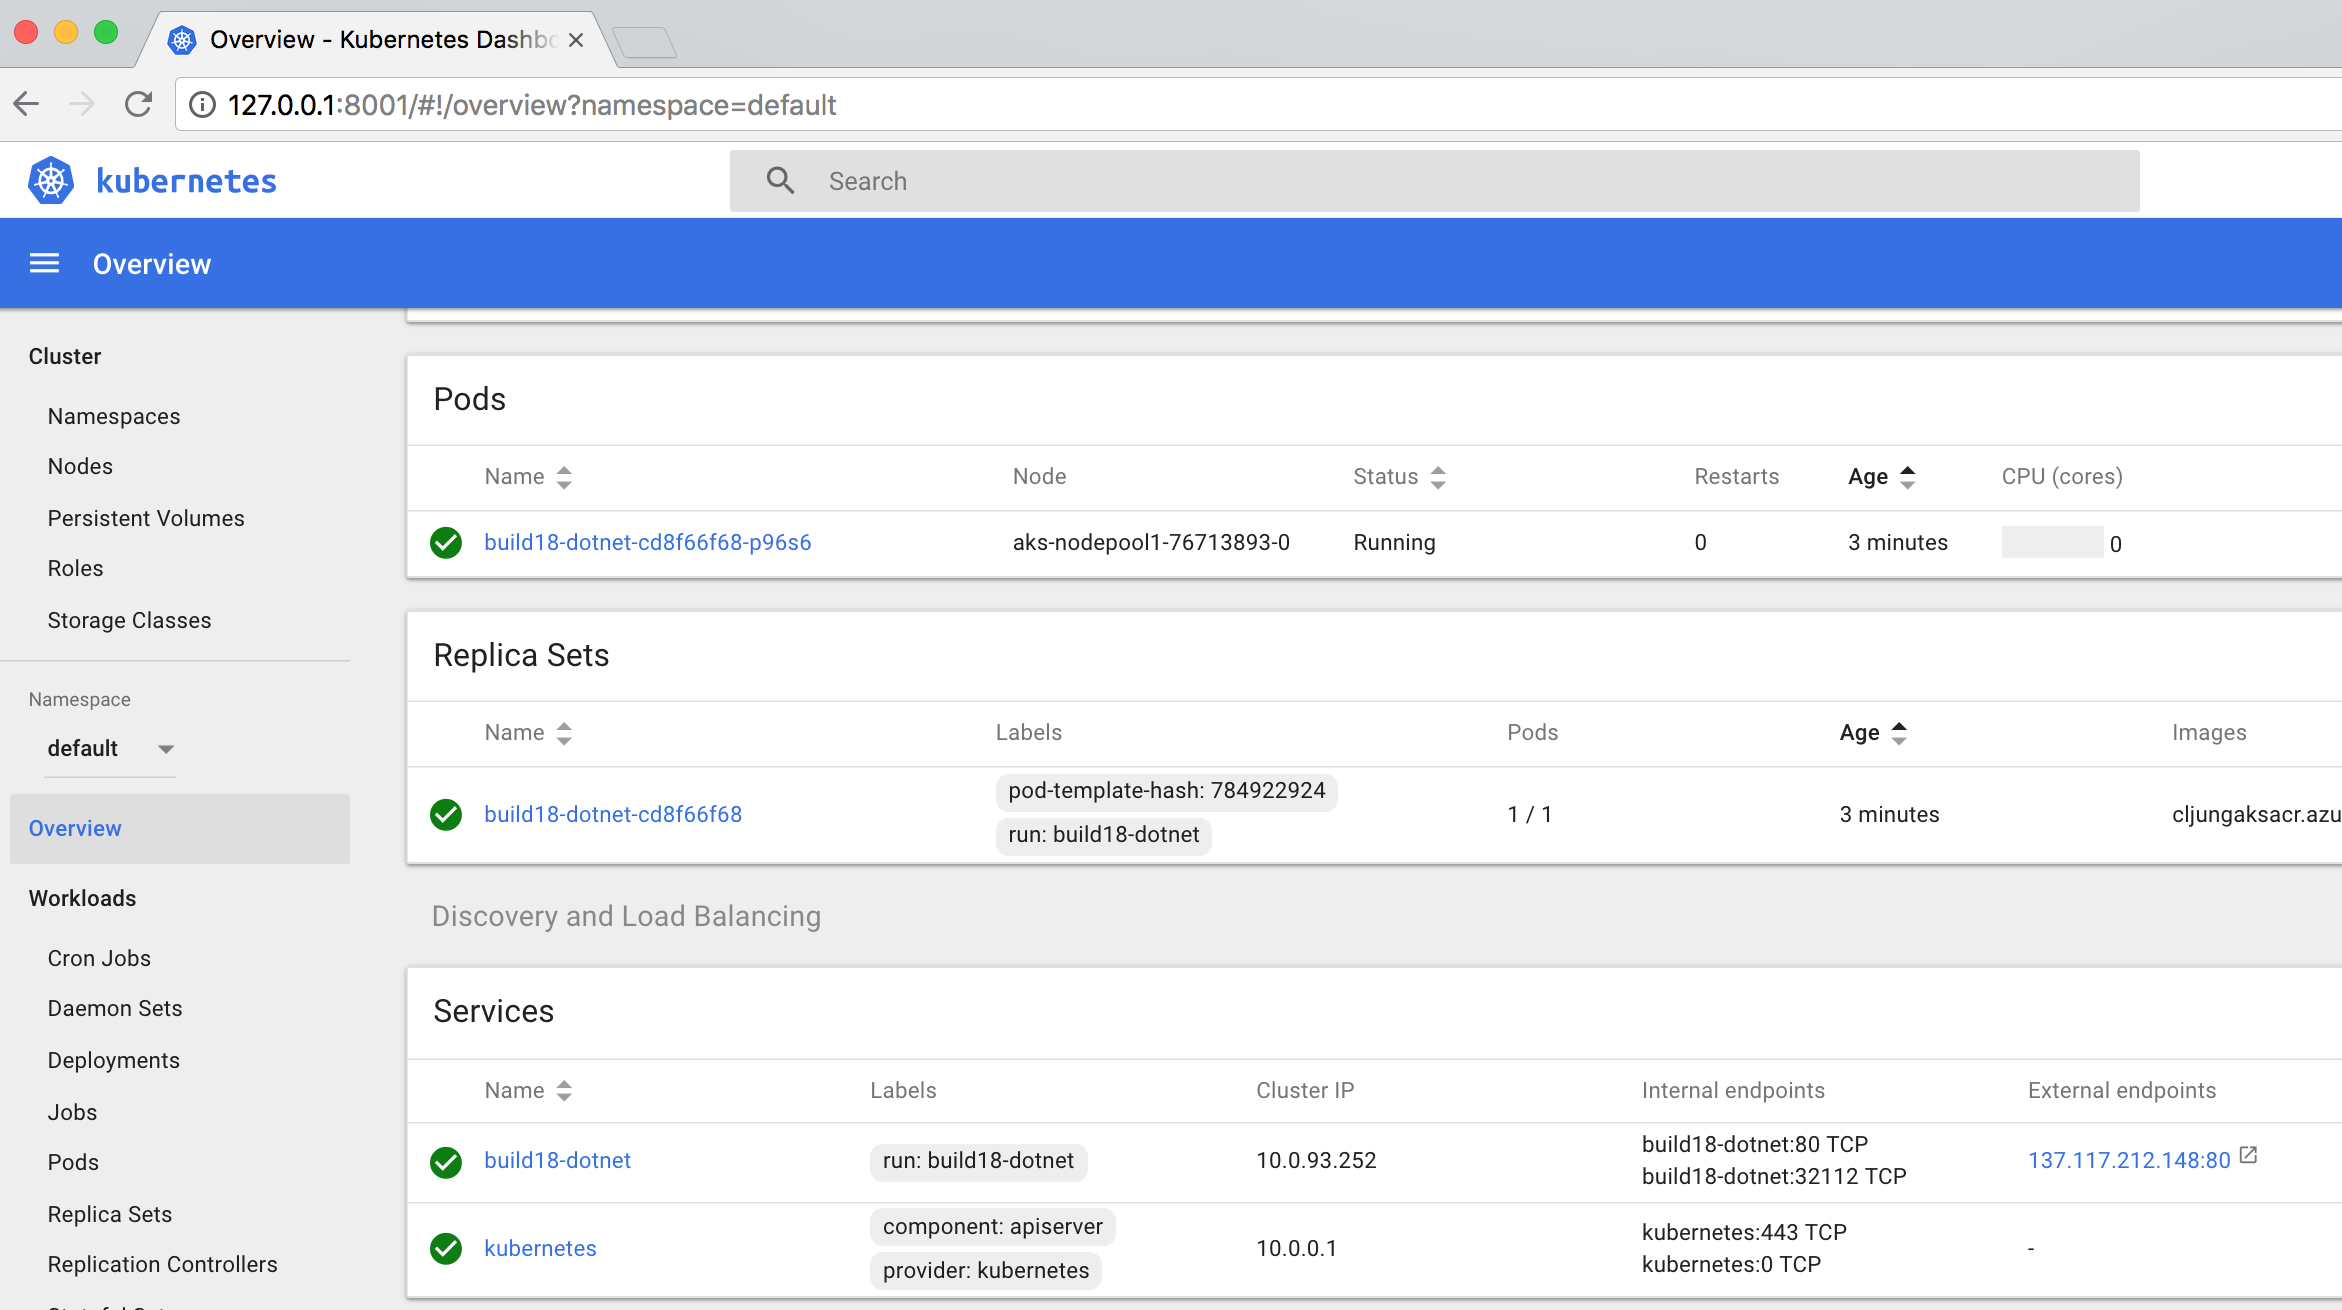
When the Service gets an ip address in the External endpoint column, then the .NET Core WebApp is ready to be used – build with VSTS on a Hosted Linux agent, pushed to Azure Container Registry and deployed to Azure Kubernetes Service. Pretty cool!