The 6th episode in my series on hands-on training for Azure is about how to use VSTS (Visual Studio Team System – the online service) to build and deploy (CI/CD) docker container apps on Azure Kubernetes Service (AKS). If episode 5 was a low-level way of getting and app onto AKS, this episode will be easy and show the power of VSTS.
This post (6a) will show you how to build docker images and push them to Azure Container Registry and next post (6b) will show you how to deploy the images in the registry onto the Azure Kubernetes Service cluster.
VSTS – Creating the project
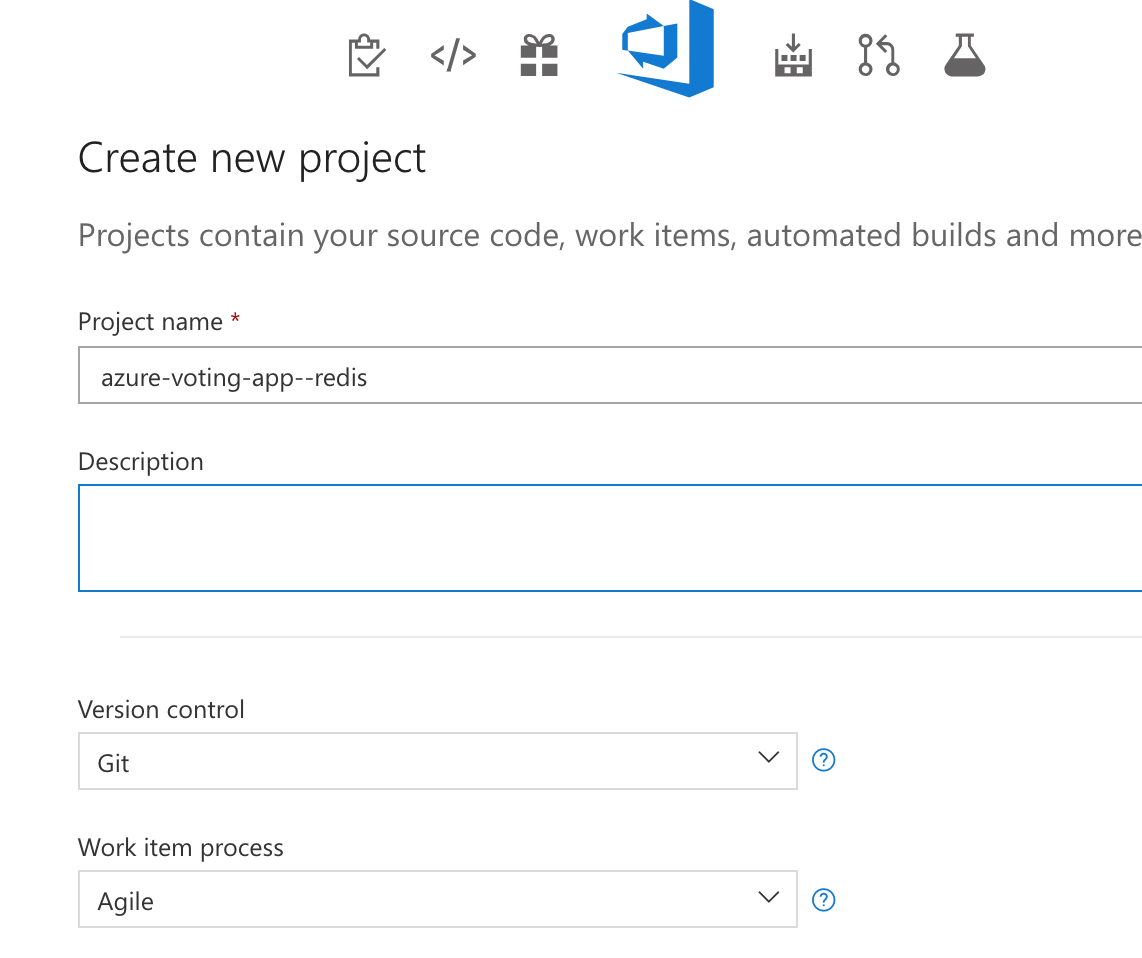
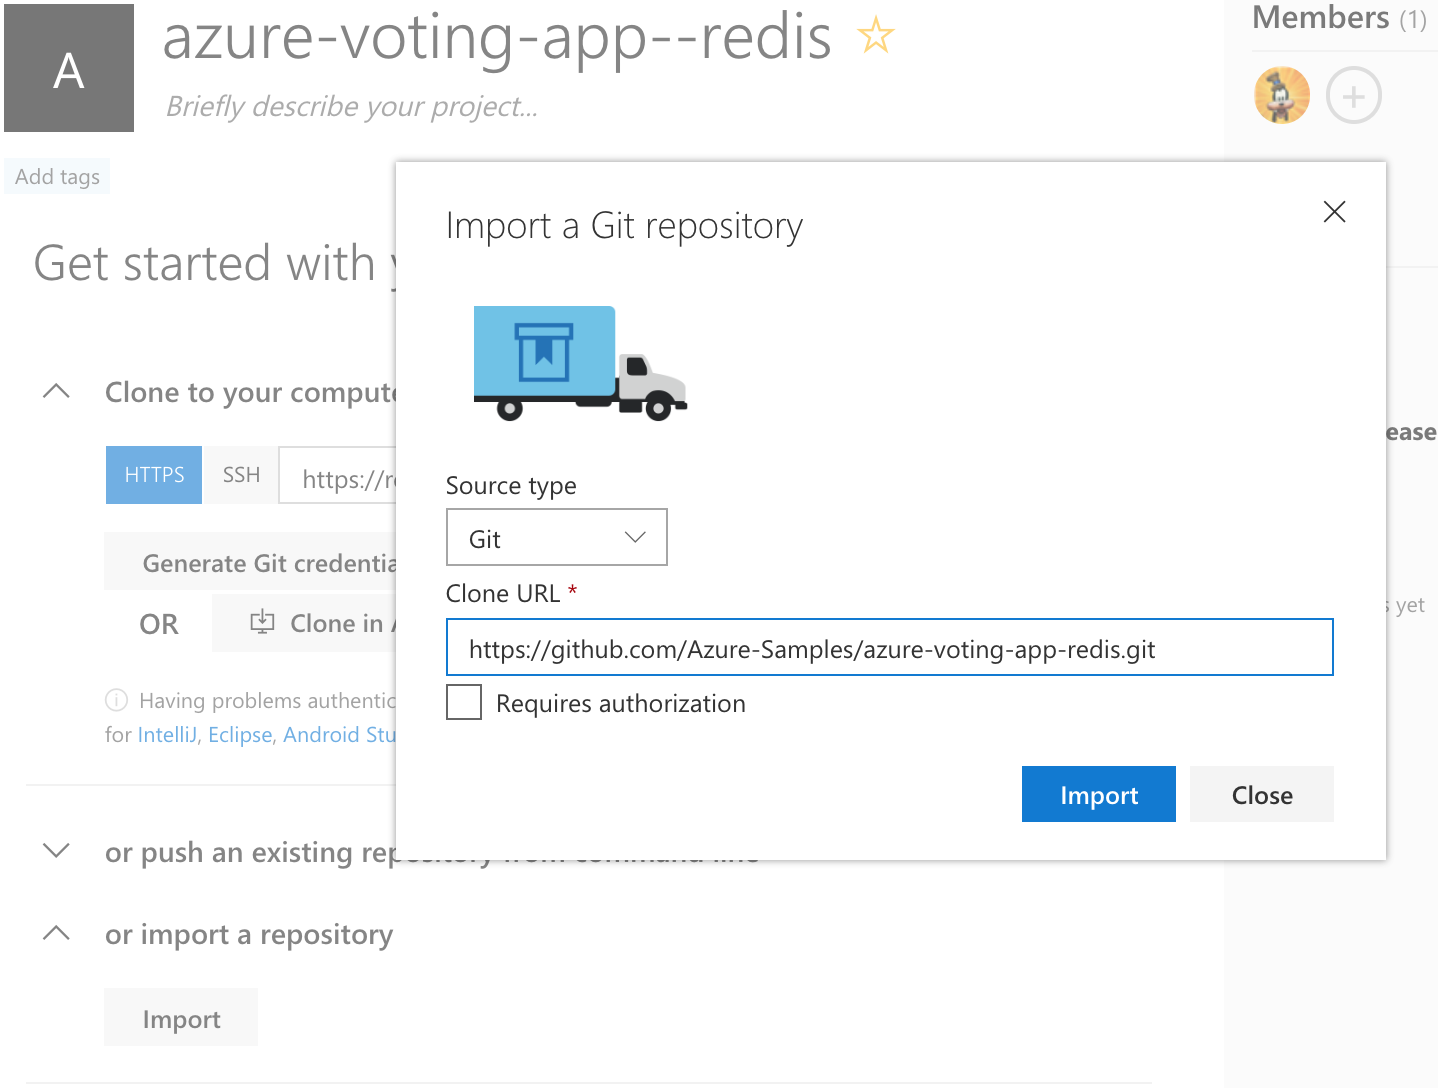
In your VSTS environment, you create a new project and you import the existing Github repo we used in episode 5, ie https://github.com/Azure-Samples/azure-voting-app-redis.git to get a clone a copy of code base.
In this page you select “import a repository” and then paste in the “git clone” url.
Continous Integration – VSTS Build
Since this is a Python project, the build process is quite simple since we have no compilers, etc, we need to exercise. All we need to do is to build the docker image(s) and publish the build artifacts.
The azure-voting-app-redis app is a 2 tier application with a web front end and a Redis Cache as the data store. This means two separate docker images needed to be built which is handled via using the docker-compose tool and with the build configuration specified in the docker-compose.yaml file. In episode 5, the building of the docker images was as easy as running the “docker-compose up” command, so how do we do it in VSTS?
You select Build and Release > Build and then + New to create a new Build Definition. Next you accept that the source is VSTS Git, your Team project, repository and the master branch. When you come to the “Select a template” you select “Empty process” instead of selected anything prefabricated.
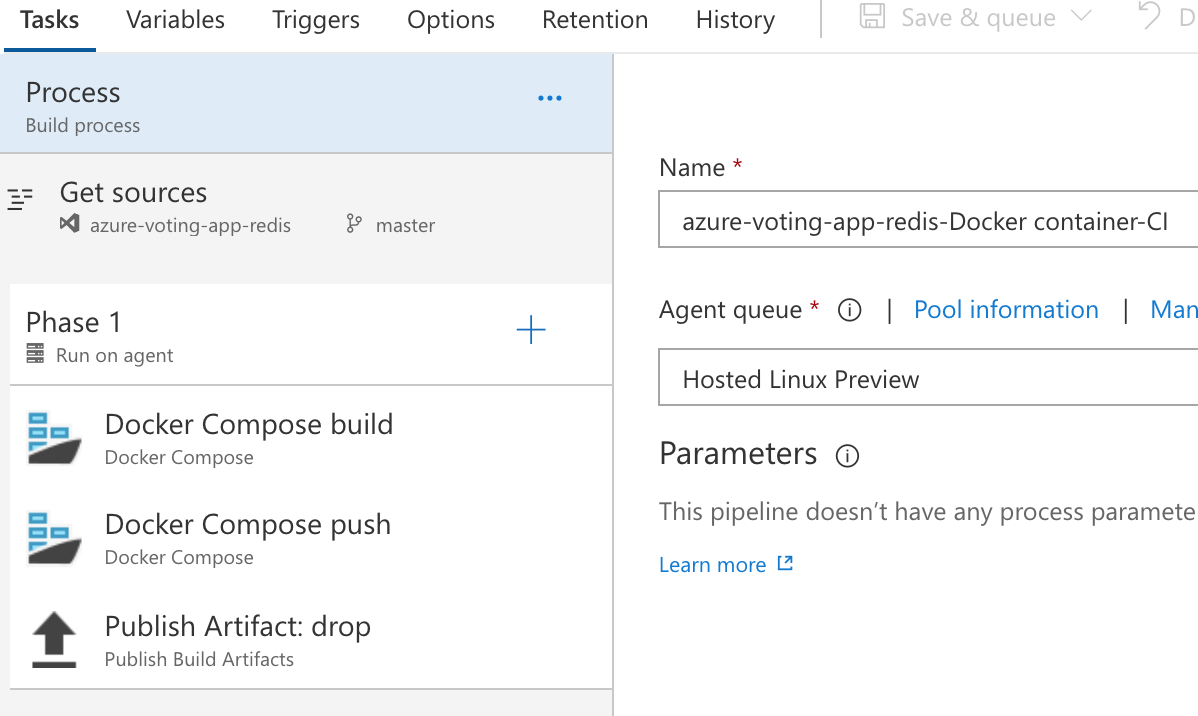
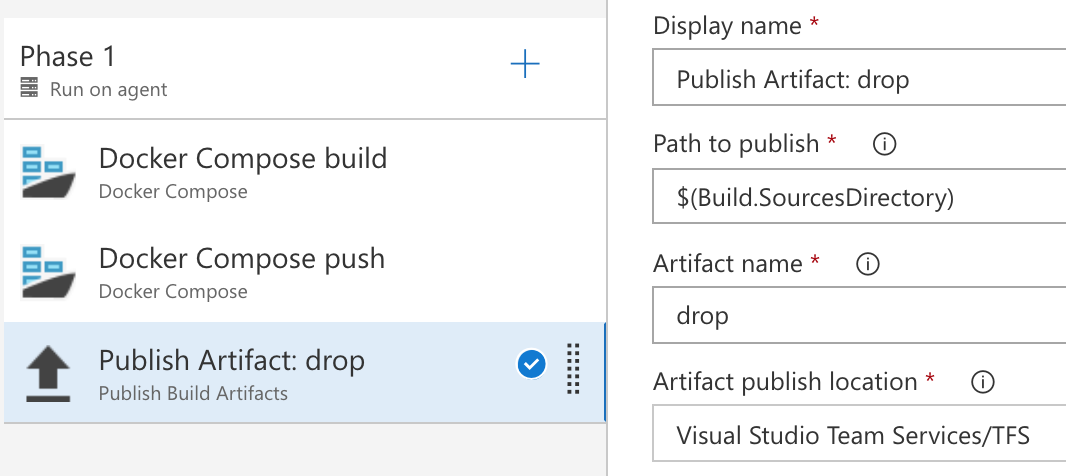
On the next page you configure the Agent queue to use “Hosted Linux Preview”, then click the + sign next to “Phase 1” on the left side, switch to the Build-tab and add two of the “Docker Compose” task items and finally add “Publish Build Artifacts”. Your build pipeline should look like below.
Build Step
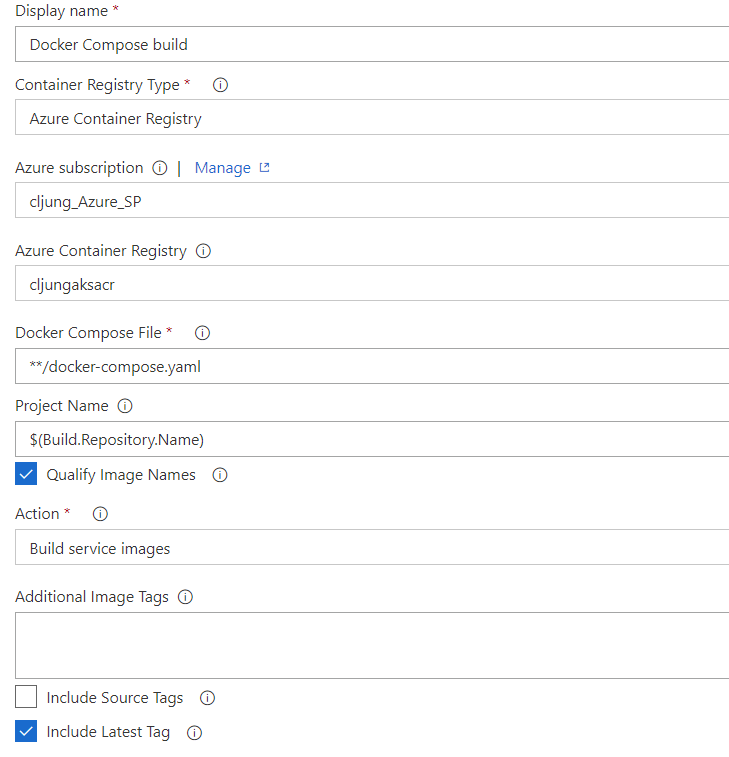
The Docker Compose Build step should have config settings as below:
- Container Registry Type = Azure Container Registry (we are deploying to Azure)
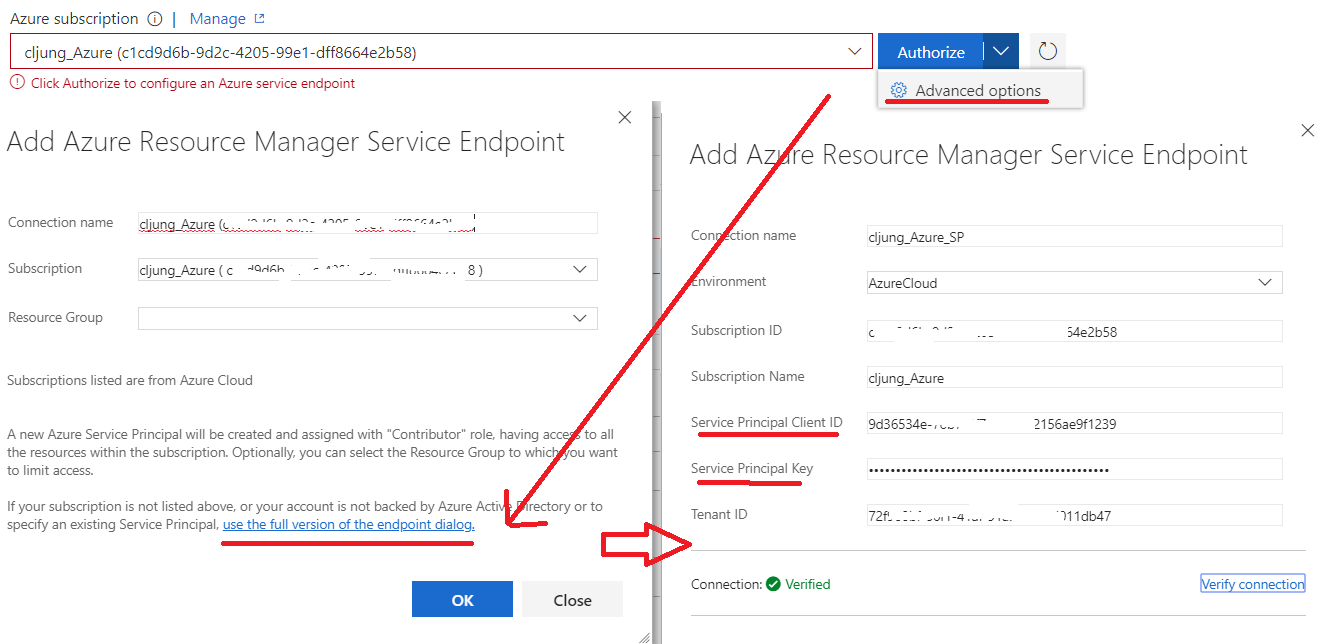
- Azure subscription = … I’ll get back to this separately below…
- Azure Container Registry = your Azure resource (must be precreated before this)
- Docker Compose File = **/docker-compose.yaml is the name of the file in our project
Notice that VSTS will suggest .yml extension but the Github repo we cloned gave it a .yaml extension - Qualify Image Names = checked
- Action = Build service images
- Include Latest Tag = checked
Push Step
The Push step have the similar config settings, except that Action = Push service images.
The push step is the one that is going to run the “docker push” command and push the docker images up to Azure Container Registry
Registering the Azure Subscription Authentication
VSTS tries to shield the user who isn’t so familiar with Azure when it comes to setting up how it authenticates to an Azure subscription via creating Service Principals for us almost without asking. I don’t really like that personally, so here’s how I do it.
- I have a pre-created Service Principal in Azure AD that has Contributor rights to the Azure subscription I’m using
- The I select the Advanced options in the Authorize drop down, followed by clicking the link “use the full version of the endpoint dialog” and there enter the details of my already existing Service Principal
If you do it the easy way, you’ll end up letting VSTS creating a Service Principal in every project you’ll ever configure to use Azure – and that will be plenty of objects floating around in Azure AD, which will lead to that one day you get a good telling off by some admin.
Publish Artifacts step
Python is an interpreted language so there are no outputs, like dlls, from the build, but there are two reasons we still need to publish the artifacts of a build. The first is that the build is a snapshot of the master branch at the time of build and without the publish step we wouldn’t have that data anywhere. The second reason is that one usage of the build artifacts is when we deploy the docker images to Azure Kubernetes Service. At that point we need the YAML file from the code base that defines how that should be done, even though the application itself is stored as images in the Azure Container Registry.
The “Path to publish” needs to be changed, since it is by default $(Build.ArtifactStagingDirectory), but since there are no binary output, etc, from a Python build, we need to change it to $(Build.SourcesDirectory) in order to publish the actual source code.
Building the Application with VSTS
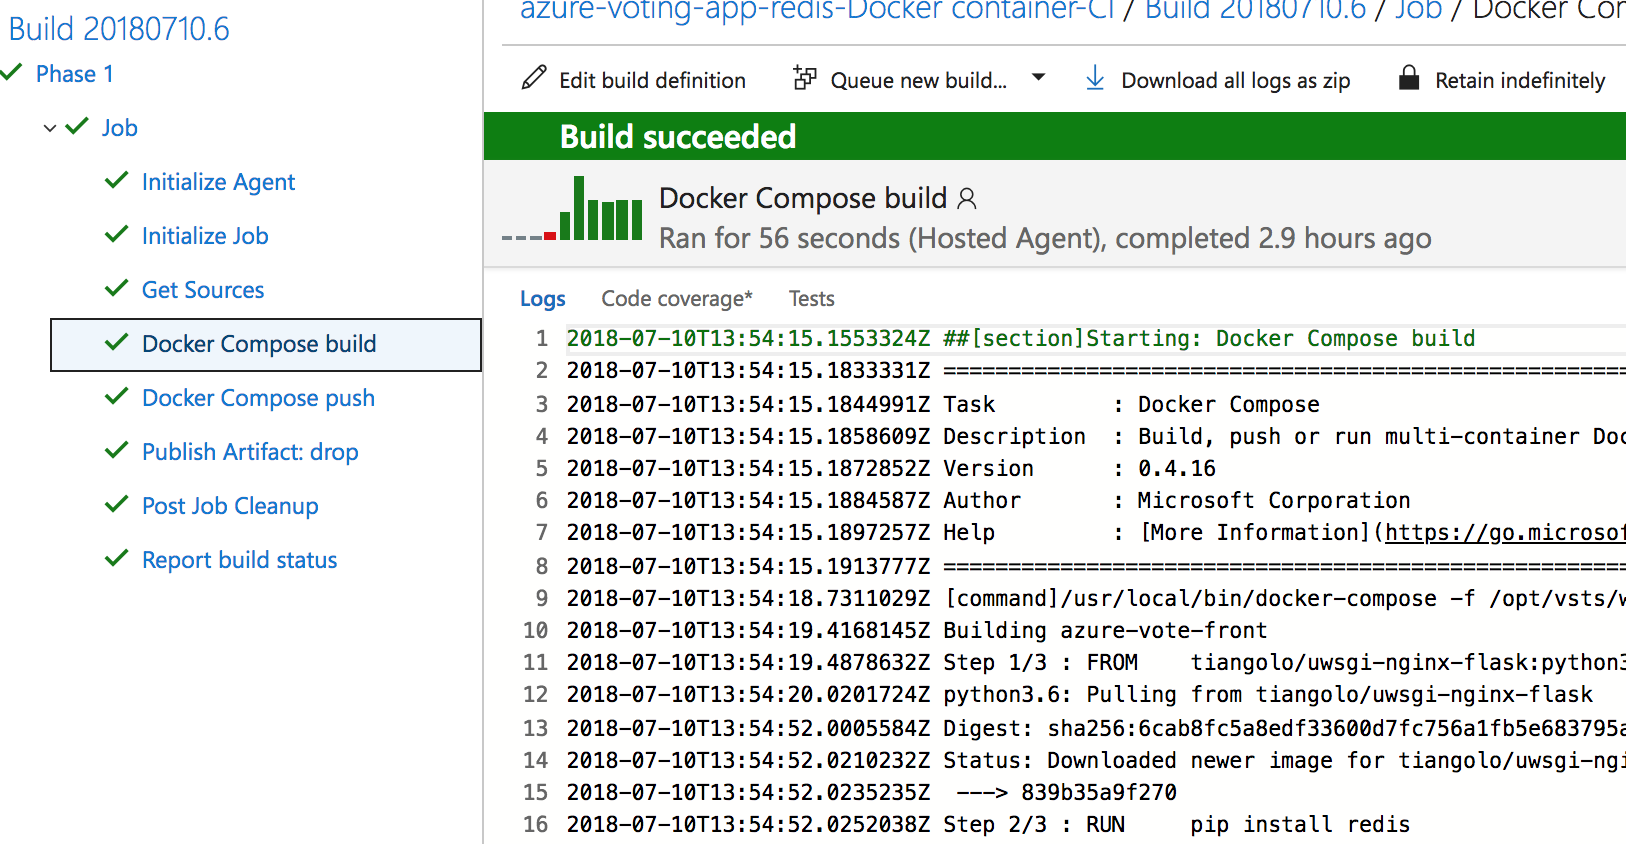
If you save the above Build Definition you can queue a new build of it. It is going to run pretty fast once it starts building and when it succeeds you can see that you have a new image in the repository of Azure Container Registry (ACR)
In next post, 6b, I’ll continue on this and add the Release step that does the Continuous Delivery and actually deploys the docker images as container applications onto the Azure Kubernetes Service.
References
Episode 5 – Containers and Azure Kubernetes Service
