At the //build and Ignite conferenses in April and May, the Nano Server was introduced as the biggest thing that had happened Windows Server since NT in 1993. If you’re not entierly new to Windows, you understand that it’s a pretty bold statement made by Distinguished Engineer Jeffrey Snover. I can tell you – he is absolutly right. As usual, I will not repeat (or steal) what other people have said or written so cleverly. I’ll put some references at the end I think you should read to start understanding Nano Server.
What’s the fuzz about Nano Server?
 Well, it’s like the Russian Doll, where you have a doll, within a doll, and so on. With virtualization today, we have a VM host that holds VM instances in a kind of flat structure. Azure holds VMs – a whole lot of VMs – but they are kind of equal, which is illustrated by the fact they have a globally unique name *.cloudapp.net. With Nano Server, you get an additional level, Physical – Virtual – Container (Nano), so to speak, and with a very small footprint (see refs). The engineers at Microsoft did go over the OS as they did in the Pearl Harbour movie where they strip the B-25 Mitchell airplane from everything not needed. With Nano Server, we are talking about VM v2 really. Please see Jeffery Snovers Ignite session and you’ll understand.
My Mission in this Post
Being a Microsoftie, working with Azure for +6 years, I’ve heard of the Nano concept for some time and followed the public presentations with great interest. Nano Server is actually used to run Azure today. Once the Technical Preview bits of Windows Server 2016 came out, I started to play with them, and when TP3 available August 21, I decided it was time to describe how you build a Nano VM that runs in Azure – and show you how to do it.
Be warned. I did some things to get the task done and when you read this, time may have caught up with my Q&D stunts. There might be better ways that I did not know of at the time. Do not take what I write here for the truth, and if you Ctrl+C, Ctrl+V, you do it at your own risk.
Download Technical Preview 3 and get started
First, you need to download the ISO image of Technical Preview 3 of Windows Server 2016 which is available in MSDN. It’s a file of some 4.5 GB. You Mount the ISO and copy the two *.ps1 files in the NanoServer directory to some working directory on your machine.
First advice – make sure you only work in 64-bit Powershell windows from here on. Shortcuts to anything saying x86 is a route to failure and lost hours. If you don’t now if it’s a 64-bit window, just do dir C:\Windows\System32\bcd*.exe and see if you get and files listed. If no files, then you are in a 32-bit windows – exit!
Second Advice – Make sure you run the powershell command prompts in elevated mode. The scripts will need it and will fail otherwise.
Next problem – I couldn’t get the New-NanoServerImage.ps1 script in the TP3 ISO to do the job. It produced the VHD without errors, but the sucker didn’t perform perfect under Hyper-V or Azure to my disappointment. I finally tried the New-NanoServerVHD.ps1 by Daniel Scott-Raynsford, and that worked (see refs). Both scripts invoke the Convert-WindowsImage.ps1 script (that you copied from the ISO) to initially create the VHD file, so in essence, you are using the same engine. The difference is the later step where you add packages to the VHD.
Tweaks
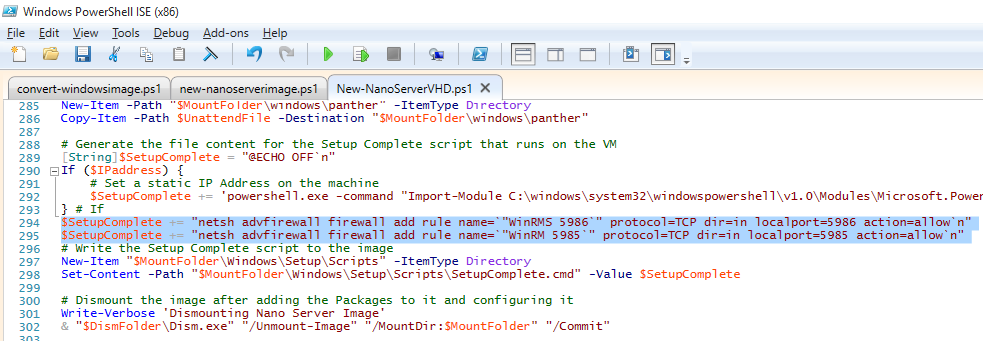
Daniel Scott-Raynsford’s script is built to produce a VHD that runs under Hyper-V and on the same subnet as the client you will use to test it. To open the firewall on the Nano Server, you have to add the two lines below. It opens the firewall for Remote Powershell over http and https. Without them, the Nano Server will work on your local Hyper-V server but not on Azure. What you are actually doing is adding lines to the C:\Windows\Setup\Scripts\SetupComplete.cmd script, which is a way do customize the installation on the Nano Server (again – see refs).
Building the Nano Server VHD
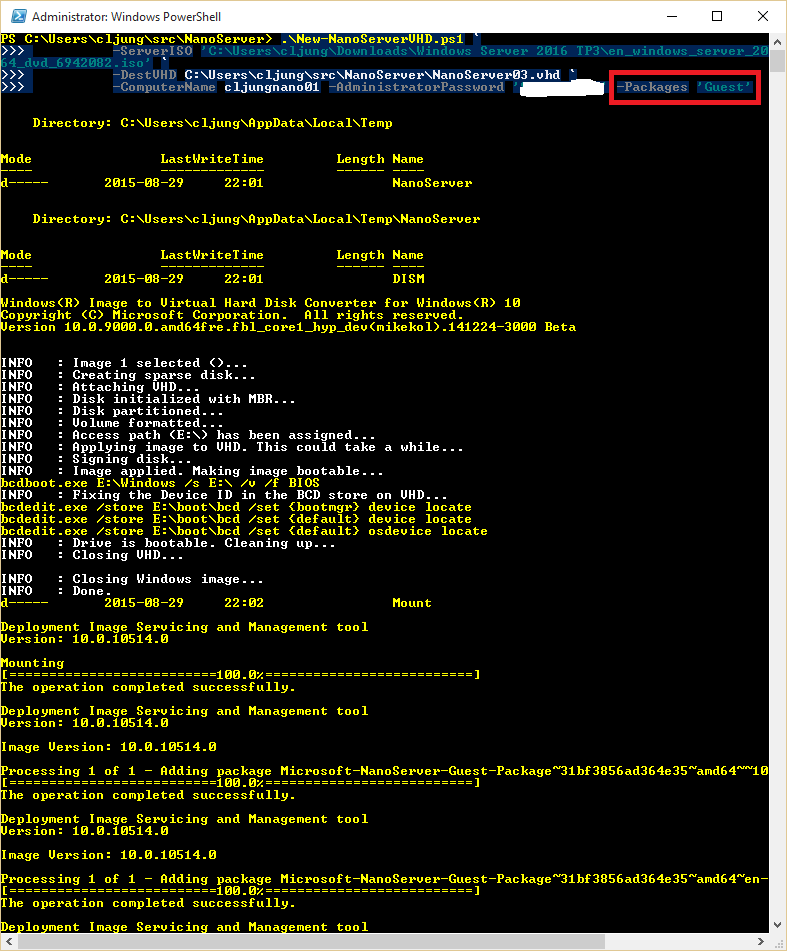
After modifying and saving the script file, just fire it away in a (64-bit) Powershell window. The command I used was the below. Notice that the only Package I add is the “Guest” to get the drivers needed for a VM running both on Hyper-V locally or on Azure. (I also edited the Convert-WindowsImage.ps1 a bit to include traces of execution of bcdboot.exe/bcdexit.exe, so don’t be surprised if you get a little bit different output).
.\New-NanoServerVHD.ps1 -ServerISO <path-to-ISO> -DestVHD <path-to-VDH>
-ComputerName cljungnano01 -AdministratorPassword ‘*******’ -Packages ‘Guest’
Third advice – make sure you get zero errors during the creationg of the VHD. This is not the time or place to say “I’ll ignore the red output from powershell”. Errors in the creation phase means it will not be a working VHD!
Testing the VHD locally
Before you start spending valuable time uploading and testing the Nano VHD on Azure, I strongly suggest that you test it locally. If you have Windows 8/10 Pro, you have Hyper-V on your laptop. If it doesn’t work locally under Hyper-V, it will for sure not work on Azure.
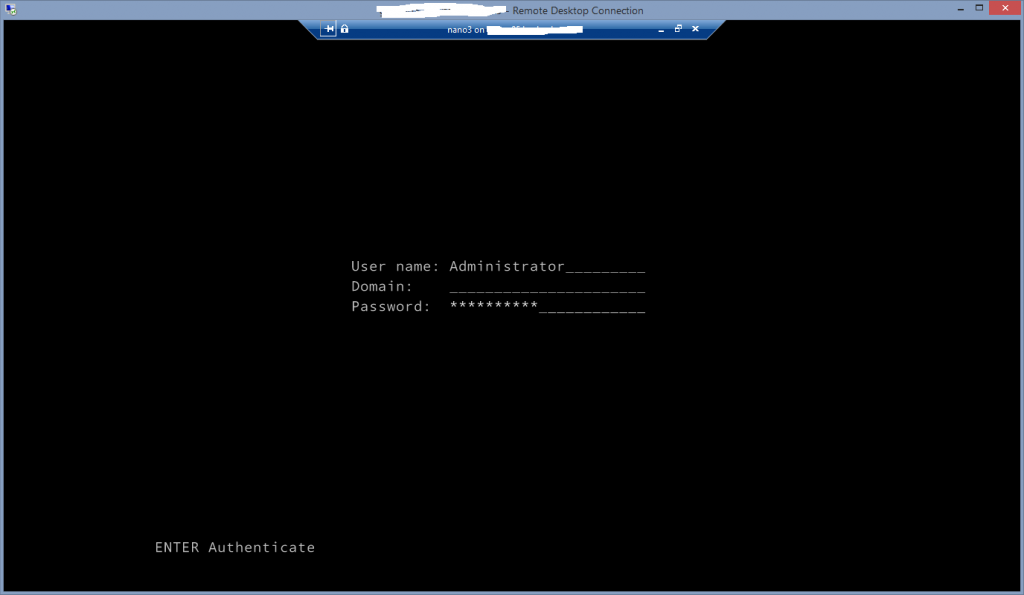
What you should be able to see and do on your local Hyper-V is the Emergency Management Screen (EMS) which is a dead simple console UI for the Nano Server. However, if you can’t logon via the Hyper-V console, you have a problem you need to correct.
Uploading the VHD to Azure
Once you have verified that it works on your local Hyper-V server, it’s time to upload the VHD to Azure. You do that by running the Add-AzureDisk cmdlet. The VHD is only some 400MB, so the upload is reasonably fast.
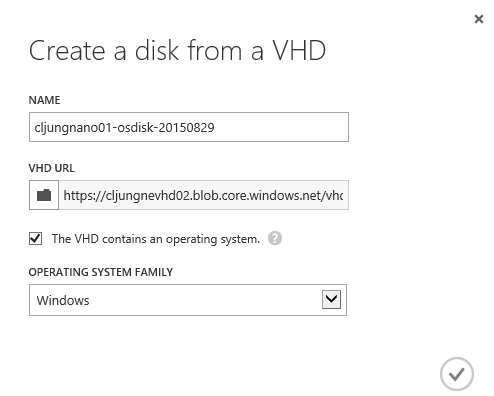
When you have the VHD file as a page blob in the Azure Storage Container of your choice, you need to create a VM Disk file from it. You do that (in the old portal) under Virtual Machines and DISKS tab.
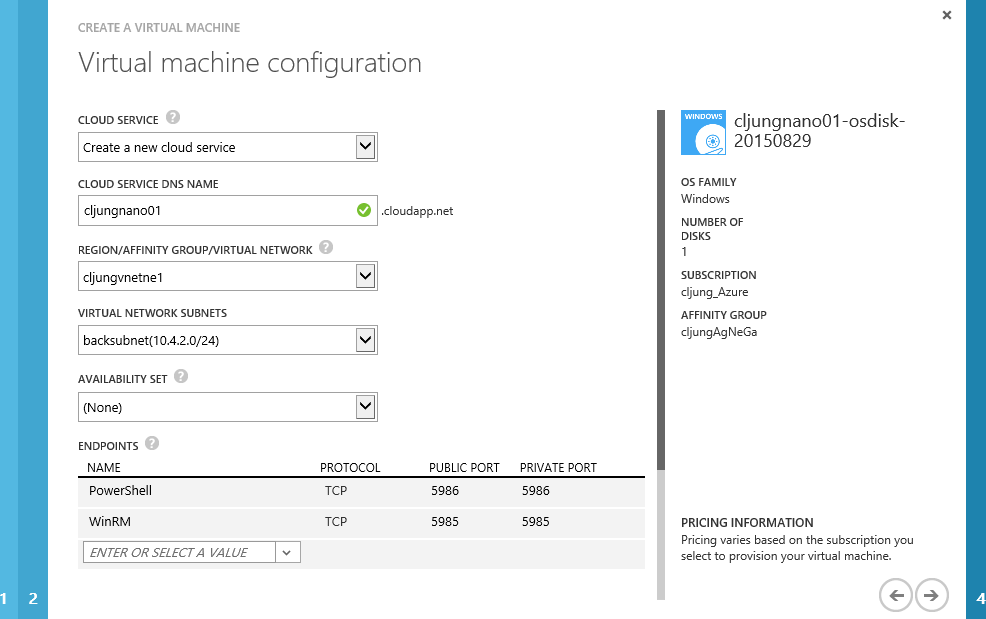
From there, you just create a VM based on that disk (choose My Disks in the Gallary). You can remove the Remote Desktop endpoint, because the Nano Server has no GUI what so ever, but for testing purposes you might add the endpoint WinRM as a TCP endpoint of public and private port 5985. This is Remote Powershell over http. By default, the Azure portal suggests port 5986 as an endpoint, and that is Remote Powershell over https. Depending if you are just eager to see that it works or not, adding 5985 might be a good idea. In reality, you shouln’t add 5985 for security reasons.
In the page after the one above, deselect the checkbox that the VM Agent is installed. It isn’t. When you are done you should see the VM going through the usual phases and finally arrive at status Running.
Remote Management of the Azure Nano Server
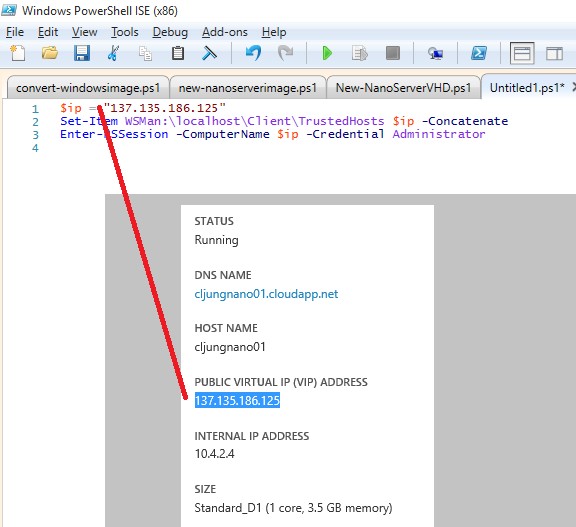
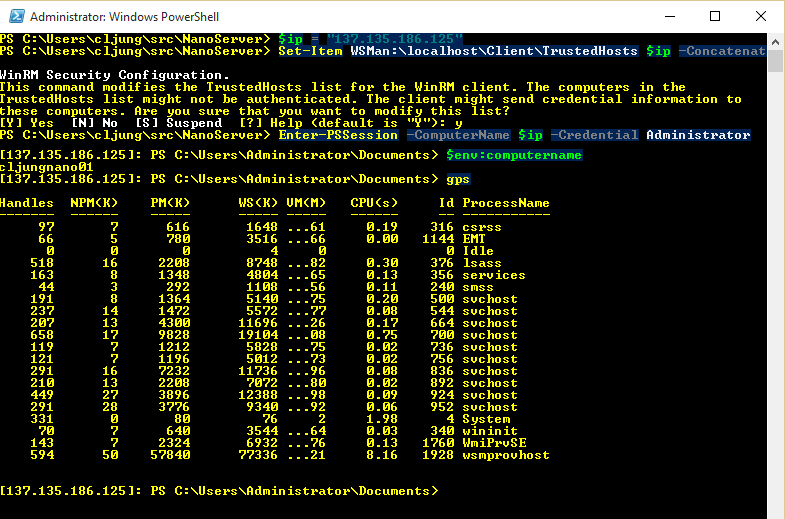
When the VM is in status Running, you should grab the public ip address of it and use it for three lines of Powershell that let’s you remotly manage the Nano Server from your laptop. The Set-Item command is needed to allow your local machine to trust the remote host. The Enter-PSSession will remote into the VM and let you work on it via the powershell command prompt.
Preferably, you should have tested this already when you had the VM running locally on Hyper-V. If the Enter-PSSession barfs in red on you, the ports are not open, you typed the wrong password or the VM is just in a miserable state.
Listing the processes executing on the Nano Server reveals that it is a pretty slimed down version of the Windows Server.
If you are familiar with powershell, you will notice pretty soon that not everything works on the Nano Server. That is because it uses Core Powershell, ie it has gone though the same refactoring as the OS to remove the dependancy of .Net. Jeffrey Snover’s session explains this.
Summary
Nano Server is what is going to be used in the future when we move from treating our servers as pets to cattle (Jeffery Snover’s words). Having a server OS of 6GB compared to 400MB is a footprint you will not be ready to accept in the future. To be honest, you have already accepted that there is no GUI on the Azure Websites, so the next step is to start doing the same on IaaS. With the lightweight server OS, we will start building containers of functionality for our solutions that we can build, deploy, scale and tear down rapidly and agile. Therefor, Nano Server is part of the future and you should pay attention to it.
In coming blog posts, I’ll show you how to get a website running on Nano Server and make use of it. With this post, you were able to build a Nano Server and get it to run on Azure.
References
Jeffrey Snover’s session from Ignite – Nano Server: The Future of Windows Server Starts Now
https://channel9.msdn.com/Events/Ignite/2015/BRK2461
TechNet – Getting started with Nano Server
https://technet.microsoft.com/en-us/library/mt126167.aspx
Daniel Scott-Reynsford script – Create Nano Server VHD
https://gallery.technet.microsoft.com/scriptcenter/Create-a-New-Nano-Server-61f674f1
Nano Server Team blog on Channel9
https://channel9.msdn.com/Series/Nano-Server-Team
New-NanoServerImage.ps1 explained
http://blogs.technet.com/b/nanoserver/archive/2015/06/16/powershell-script-to-build-your-nano-server-image.aspx
Convert-WindowsImage.ps1 explained
https://gallery.technet.microsoft.com/scriptcenter/Convert-WindowsImageps1-0fe23a8f
