This is the second post of two about rehosting old web application quickly to Azure. Previous post showed how to move a website in just seconds to Azure WebApps. This post shows how to in a matter of minutes move a SQL Server database to SQL Azure in a 100% automated way.
Migration strategies
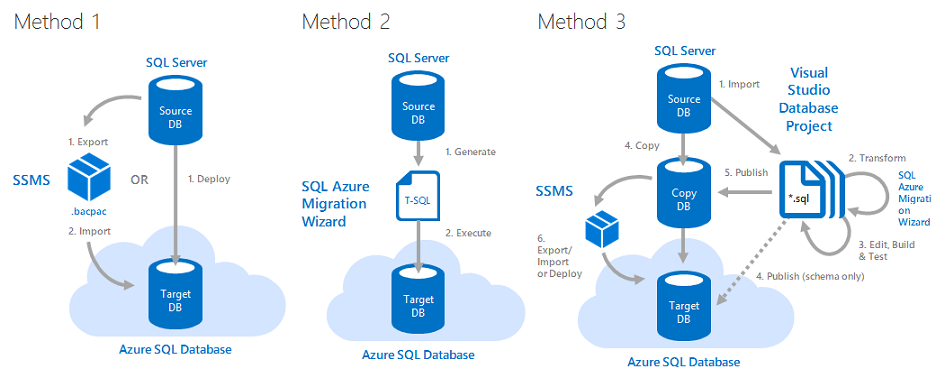
There is an excellent article that documents several migration strategies in detail of how to get your SQL Server database on to SQL Azure. It outlines three different methods, where method 1 is a simple rehost step and the other two requires refactor is some degree if the database contains incompatibilities that need to be handled. This article is a must read when you start planning your migration.
My migration scenario
My migration scenario will be an fully automated procedure of Method 1 in the picture above. I will installed the old pubs sample database on a local SQL Server 2014 installation I have on my laptop. The pubs database was discontinued with SQL Server 2000 and was therefor a good choice of an “old” database in need for migration besides being a bit nostalgic too. Below in the references you have a download link to scripts that will install the pubs database.
The automated migration will be done in three steps
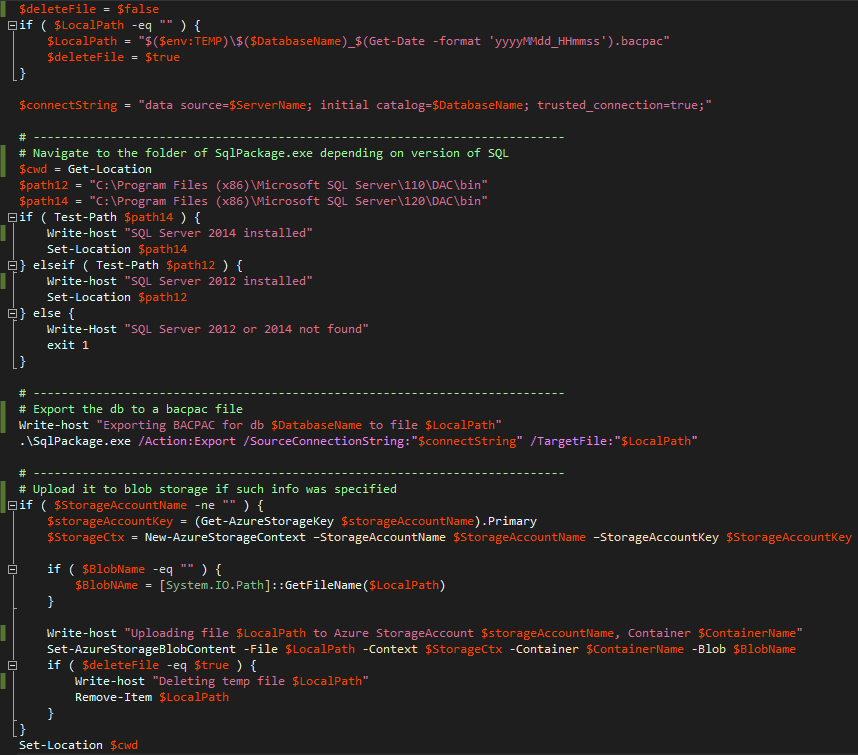
- Export the database into a BACPAC file using SqlPackage.exe and upload the BACPAC-file to blob storage
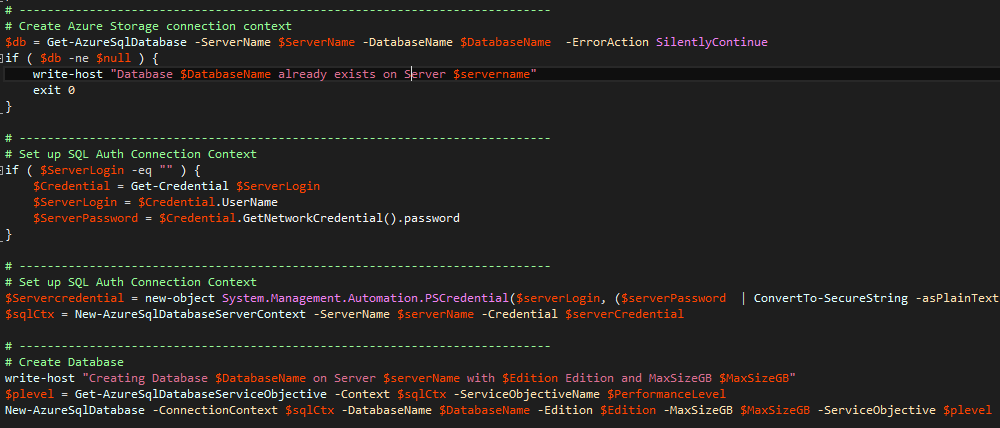
- Create the pubs database in SQL Azure
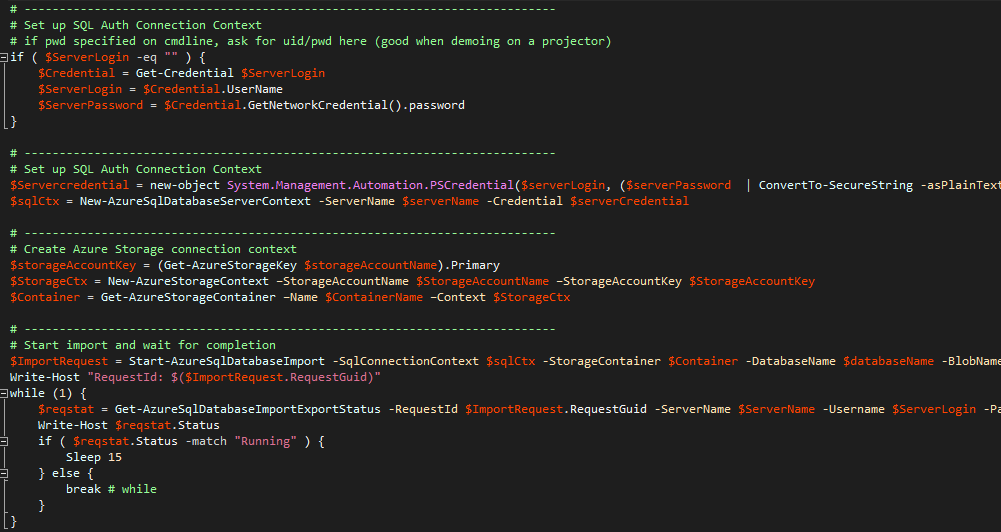
- Import the BACPAC-file in blob storage to the newly created SQL Azure database
I have created a separate powershell script for each step and then also a fourth powershell script to run all the steps. This way you get small scripts that you can reuse and the example is not bloated with many lines of code.
Step 1 – export the BACPAC
The first step includes two major tasks. Invoke the SqlPackage.exe command line tool to export the database into a BACPAC-file and then use Azure powershell to upload the file to blob storage. I made the script work with both SQL Server 2012 and 2014. This script must be run on the SQL Server machine or on a client machine where you have the client tools installed. If you run it on a client machine, you have to modify the connection string.
Step 2 – Create the SQL Azure database
This step is really no magic. It checks it the database already exists and if it doesn’t we create a new SQL Azure database with the Basic Edition. If you are migrating something for production you need to make sure that the Edition is big enough so that import in step 3 will succed. Since you can change the Edition quite easily in the portal, my advice would be not to spend to many clock cycles in the migration process to find the optimal size of the db and leave that for later when the db is up and running.
Step 3 – Importing the BACPAC-file
The main task of the import step is handled via the powershell cmdlet Start-AzureSqlDatabaseImport, which takes a database context and a blob storage container/blob reference as input. This cmdlet starts a background process in Azure that imports the BACPAC-file and we can monitor the progress with repeatetive calls to Get-AzureSqlDatabaseImportExportStatus cmdlet.
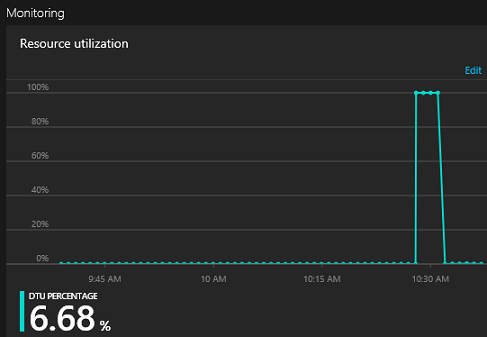
While the import is running, you can observe that the Resource utiliztion graph in the new portal spikes for a short time. When it drops down to zero, the import is complete and the database is ready to use.
Putting it all together
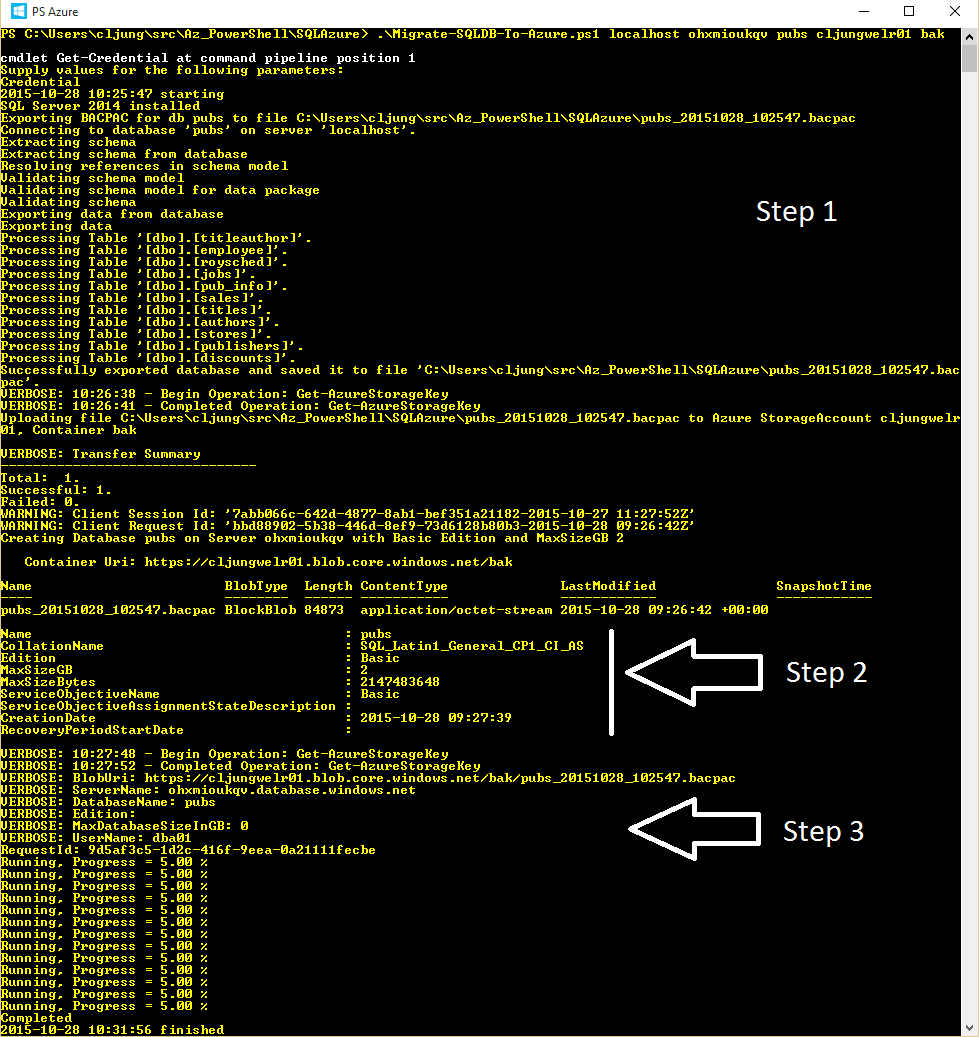
Below you can see a screenshot from a test run I did. I have highlighted each step in with white labels on the right side. Step one is output from SqlPackage.exe as it exports the schema and the data in each table followed by the upload of the BACPAC-file to blob storage.
Step 2 is the output from the New-AzureSqlDatabase powershell cmdlet. If you rerun the migration script when the database exists, it will just say “Database pubs already exists” and continue.
Step 3 consists of the VERBOSE output from Start-AzureSqlDatabaseImport and then some echoing of the polling of the status. As you can see, there is something funny going on here, because it only says “5.00 %” and then it completes. However, that is nothing to be alarmed of and is probably a bug in the powershell cmdlet.
Please note that the total time for running all steps was only 6 minutes. That means that you can migrate small to medium databases in a very short timeframe. If you database is in double digit GB size range, the upload to blob storage will take longer of course and so will the database import. However, the speed of the import is also a consequence of what Edition of the SQL Azure database you selected. If you want the import to run super fast, then you create the database with the largest size you can afford and after the import is completed, you scale it down.
References
Migrating a SQL Server database to Azure SQL Database
https://azure.microsoft.com/en-us/documentation/articles/sql-database-cloud-migrate/
Pubs sample database download
https://www.microsoft.com/en-us/download/details.aspx?id=23654
Documentation for exporting a BACPAC
https://azure.microsoft.com/en-us/documentation/articles/sql-database-export-powershell/
Sources
http://data.redbaronofazure.com/public/migrate_pubs_to_sqlazure.zip
