This post is the first in a series of many where I will try to describe how to protect your website from a datacenter failure. The first post really has nothing to do with Disaster Recovery – or how to avoid it. It is rather an intro on how to use Azure DNS to get your website fronting your own domain so that we in later posts have the baseline.
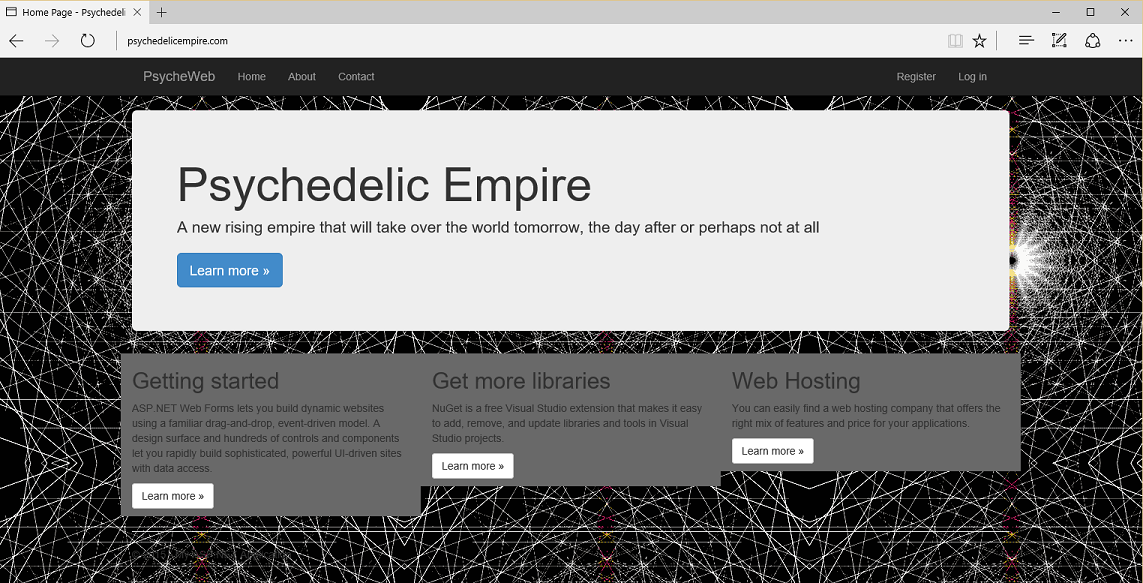
Say hello to Psychedelic Empire!
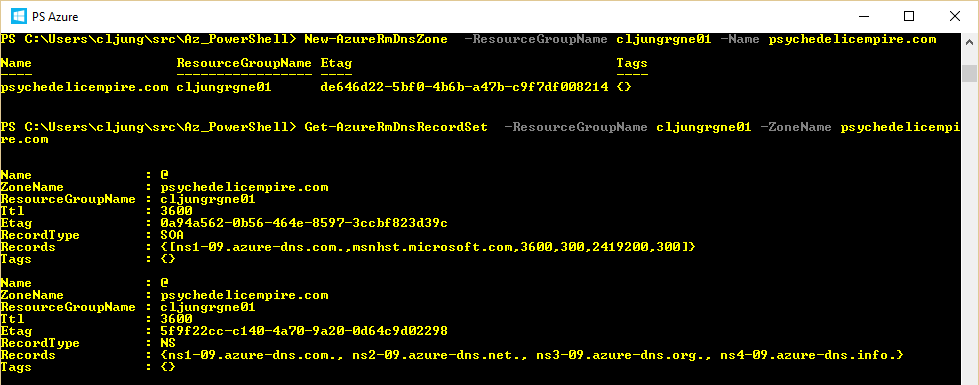
I needed my own contoso.com to have a domain to play with, so I registered the domain name psychedelicempire.com in lack of a better name. That only costed som ~15$ with Network Solutions and in order to avoid further cost, I decided to use the new Azure DNS to be my authorative name servers. It is quite easy to get started and you just issue the powershell command New-AzureRmDnsZone to register the zone psychedelicempire.com in your Azure subscription.
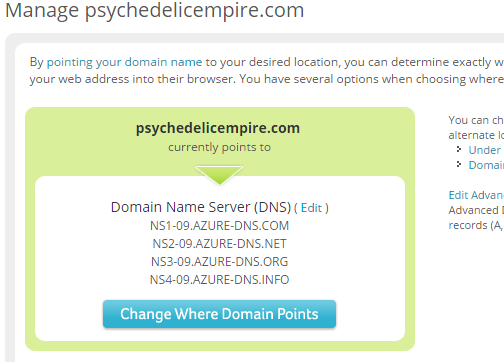
This creates the zone with the SOA and NS as initial records. The NS records give you your DNS servers which I need to update in my domain registration.
You need to wait some time (minutes or hours) for the DNS registration to kick in. You can see that it is ready when you can do a nslookup on the domain for it’s name servers.
The Psychedelic Empire Website
I created a ASP.Net web application basically by doing next, next finnish in the wizard. Okay, since it’s not just some random website but rather the majestic and all mighty Psychedelic Empire I’m creating, I edited the master page to make the website go with the name a little better. From Visual Studio, I then published the website as an Azure WebApp in AppServices and tested it with its xxxxxx.azurewebsites.net name.
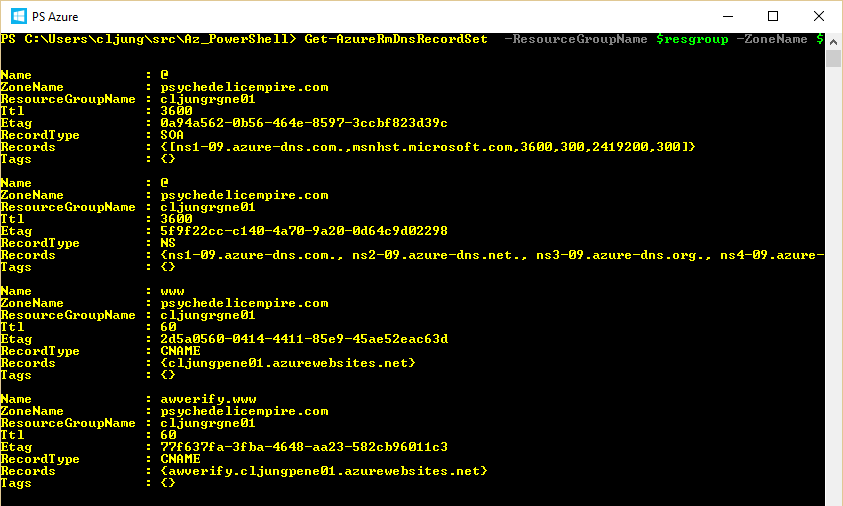
In order to make it respond to when you browse to www.psychedelicempire.com, I added the CNAME records for www and awverify.www to my Azure DNS
My entire Azure DNS settings looked like below at this point
Before going further and updating the Azure portal with the host names, you got to check that the CNAME DNS records are available or else the Azure portal will complain that the records cannot be found.
Above, you can see that both my Azure name server and my local DNS server can see the CNAME record, which means the portal update will succeed and we can start browse to the site. You need to change the Pricing Tier from Free to atleast Shared to be able to add a Custom Domain in the portal.
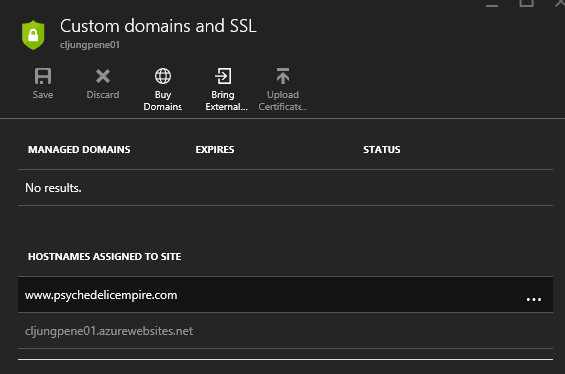
If you haven’t done it before, hit the Bring External button and follow the instructions.
Note – if you have an A-record already pointing to the Azure website when you create the CNAME, the resolving might be a little weird. It is mentioned in an error message in the portal. You can see all my DNS-records in a screenshot above.
The Majestic website of Psychedelic Empire
http://www.psychedelicempire.com
Summary
This first post is only to show you how to get started and set up your webapp that fronts your company’s internet facing website. I showed you how to use Azure DNS, since that will make you host something like your own psychedelicempire.com with a cost of just ~15$ added to the Azure cost. This is a starting point we need when we in later posts will make sure we do not end up in manual Disaster Recovery procedures, because with my current deployment, if there is a disturbance in the force in the North Europe Azure datacenter, my site is at risk. I have no redundancy even though I have an SLA. Next step is to secure it across multiple datacenters to make sure it is resillient to a singe datacenter failure.
Is Azure DNS safe, you might ask your self? Well, look at the four name servers I got and why the names have different top domains. Can it be that they are spread out across the world?
References
Getting started with Azure DNS using Powershell
https://azure.microsoft.com/en-us/documentation/articles/dns-getstarted-create-dnszone/
Follow the links at the bottom for how to create a CNAME, how to modify records and how to delete them
Configure a custom domain in Azure AppServices
https://azure.microsoft.com/en-us/documentation/articles/web-sites-custom-domain-name/
